In the Database Explorer, activate (click on) the Purchase Invoices (PI) journal.
The Purchase Invoices journal can be found by expanding the following folders: NewViews/Journal/Purchase
Make sure you are on the Transaction Explorer view of the journal.
JOURNAL/PURCHASE/PI - Transactions Explorer (where PI is the name of the purchase invoices journal) should be displayed in the title bar across the top of the window. If you are not on the Transactions Explorer views, click the Transactions tab below the title bar.
Add the new purchase transaction by pressing <Ins> or by using the Edit>Append command.
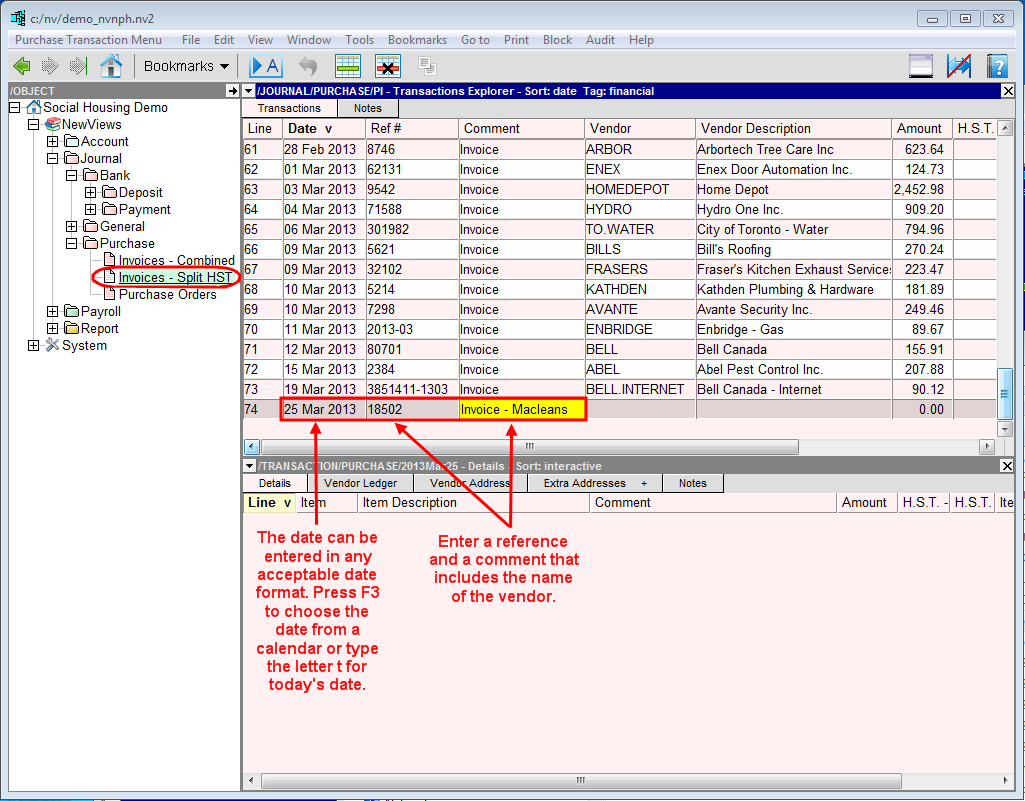
Enter the purchase date and reference number. In the Comment field, enter Invoice - (company name). For example, if this was a onetime purchase for a Maclean's magazine subscription, you could enter Invoice - Macleans in the Comment field.
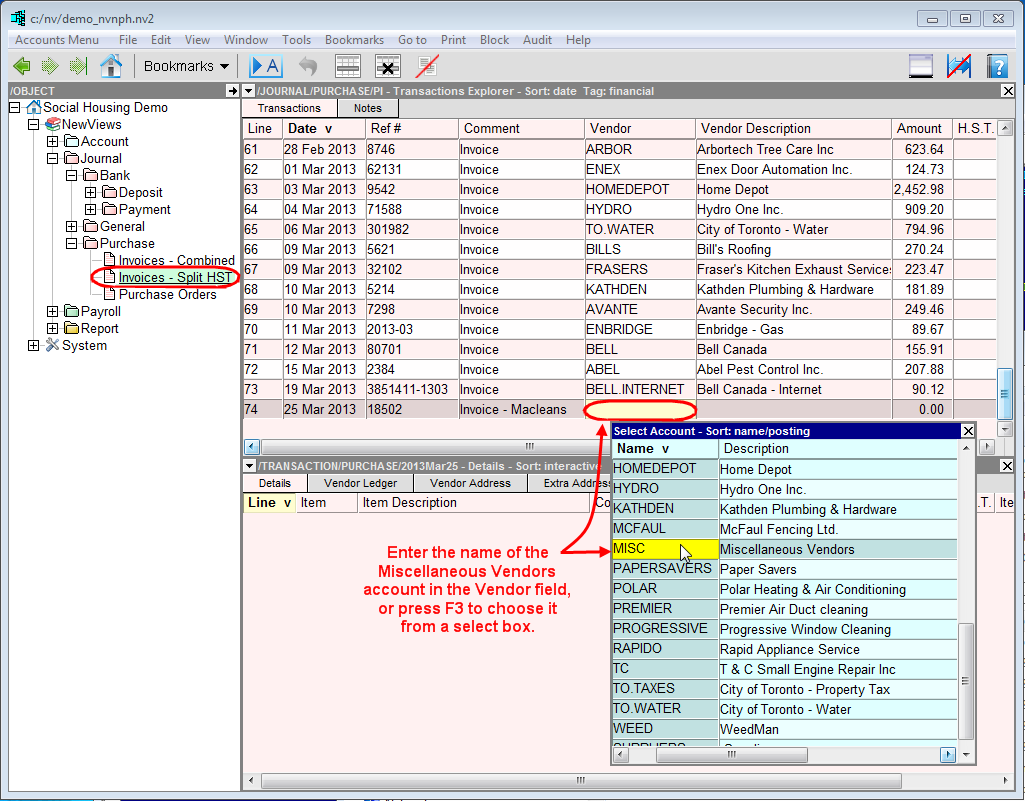
In the Vendor field, enter the name of the miscellaneous vendor account (typically MISC).
As this type of transaction is complex, all other details are entered in the detail window.
If the transaction detail window is open, click anywhere in the bottom window. If the detail window is not open, double click the purchase transaction to open it.
The title bar of the transaction detail window should read /TRANSACTION/PURCHASE/(date) - Details where (date) is the date of the purchase.
Use the command Edit>Append to add each purchase item to the detail window, using the example below as a guide. Note: Pressing <Enter> on the last field of an item will create a new item.

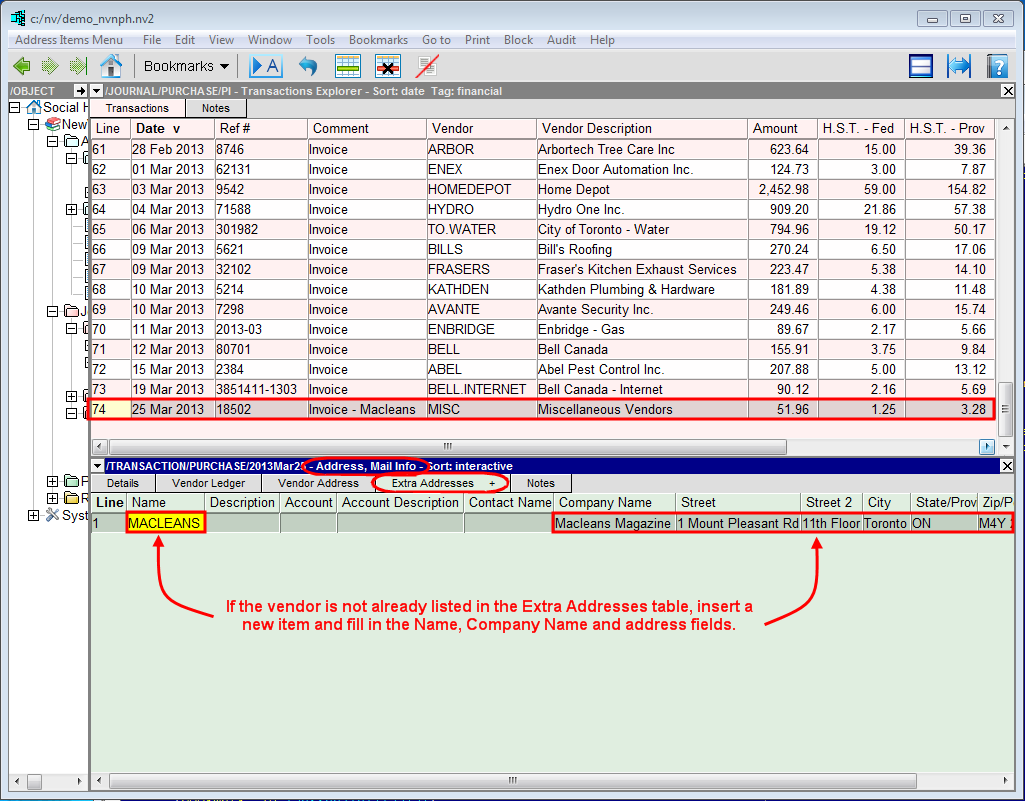
Once all the purchase items have been added, click the Extra Addresses + tab and choose Mail Info to add name and address information for the vendor.
Note: All addresses that have previously been added for miscellaneous vendors will appear in the Extra Addresses view. Before adding any new information, check to see if the information for the vendor has already been entered. If so, it is not necessary to add it again.
Note: Remember to click the Details tab to switch back to the Details view once address information has been entered.

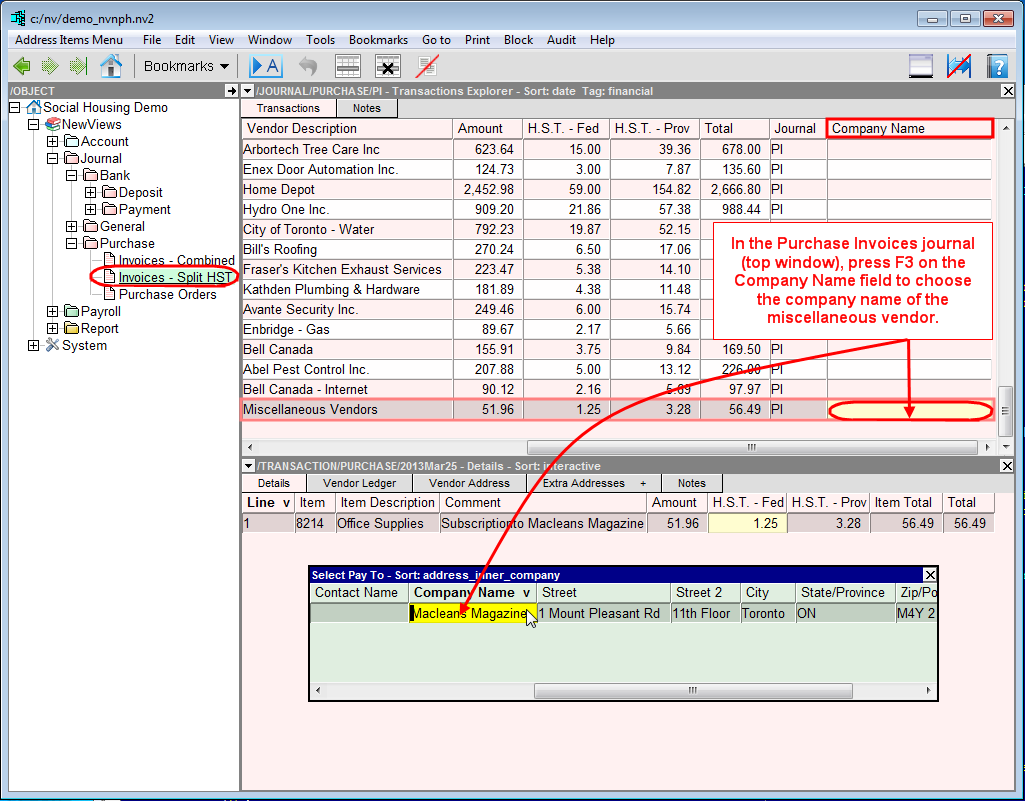
To link the company address information to the purchase transaction, return to the transaction in the top window and position on the Company Name field. Press <F3> to choose the company name from the table.
If this is the first time a purchase transaction for a miscellaneous vendor has been added to the books, the Company Name column may not be visible. If this is the case, use the View>Pay to Company command to display it.