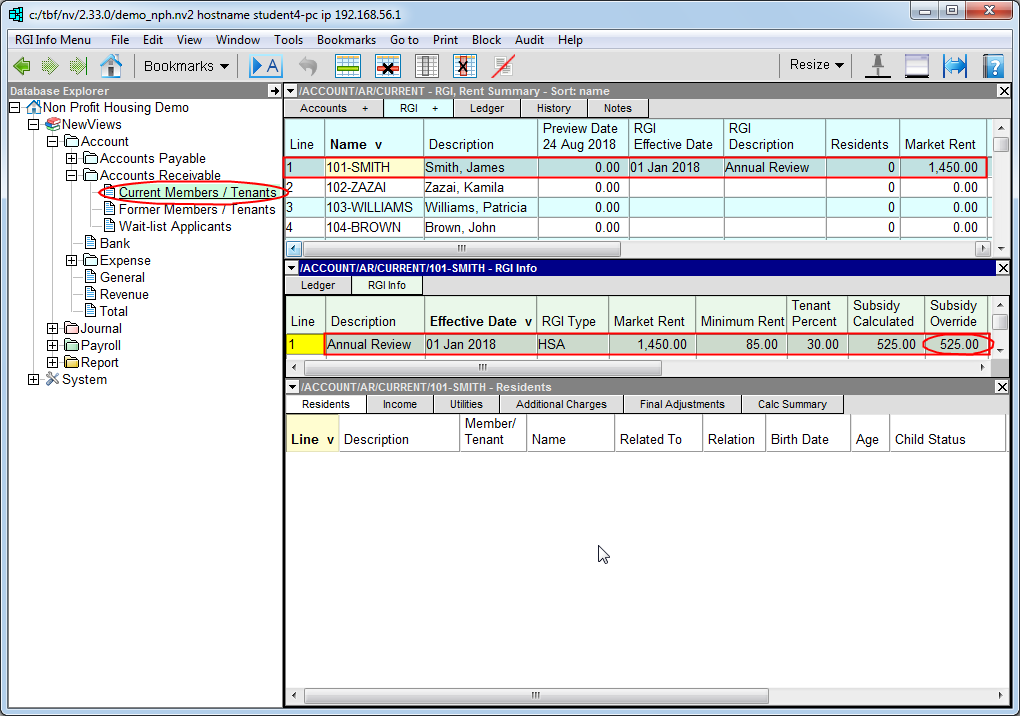
In the Database Explorer, activate (click on) Current Members/Tenants.
Current Members/Tenants can be found by expanding the following folders: NewViews/Account/Accounts Receivable
Make sure you are on the Rent Summary view.
This view summarizes information that is entered in the RGI Info table.
/ACCOUNT/AR/CURRENT - RGI, Rent Summary should be displayed in the title bar across the top of the window. If you are not on the Rent Summary view, click the RGI + tab below the title bar to select it.
Position on the member/tenant account, then click the RGI Info tab in the middle pane.
Note: If no middle pane is displayed, double click the account in the top pane to display the detail panes.
Click anywhere in the RGI Info table, then use the Edit>Append command or press <Ins> to add an item.
Enter a Description, Effective Date and Market Rent value for the unit.
Enter the subsidy amount in the Subsidy Override field.
Click the Residents tab in the bottom window (3rd pane). If the third pane is not visible, double click the RGI entry to open it.
Use the Edit>Append command or press <Ins> to add an item. Use the chart below as a guide to enter the information for the first member of the household (generally the head of the household).
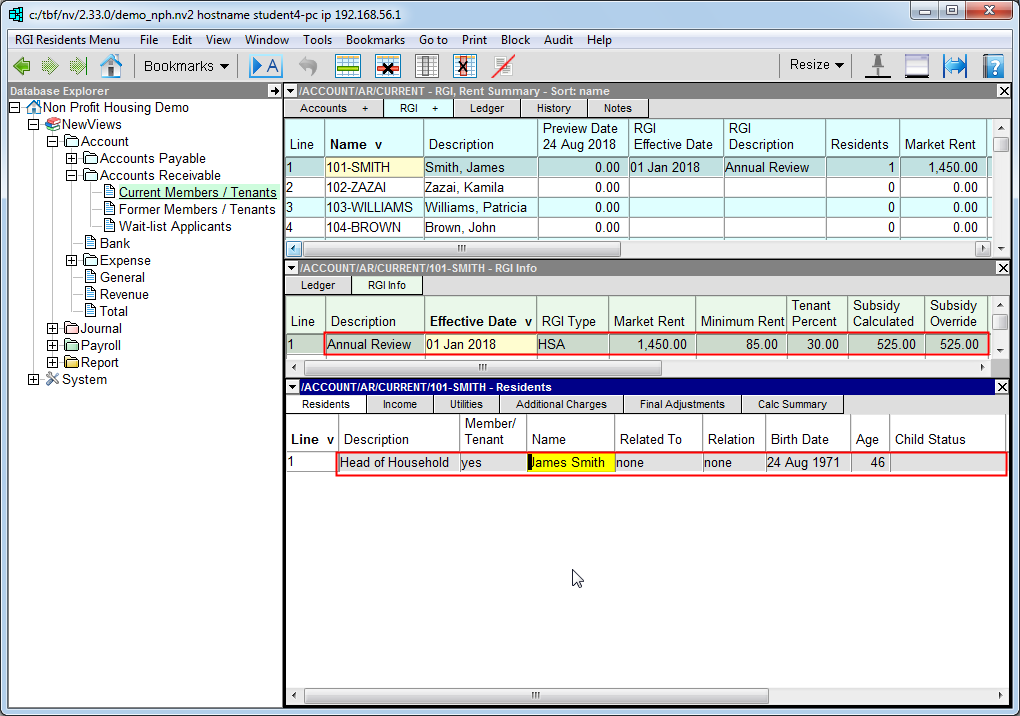
| Description | This field can be used to identify the head of household (family/benefit unit) or to describe the relationship of one resident in the household to another (i.e. a relationship that is helpful to know, but not meaningful for subsidy calculations, e.g. grandmother or brother). |
| Name | Name of resident. |
| Related to | Press <F3> to pick from a list of residents, or none. Choose none for heads of family/benefit units. For all other residents, pick the appropriate head of the family/benefit unit. |
| Relation | Press <F3> to specify the relation of the resident to the head of the family/benefit unit. Choose none for heads of family/benefit units. For all other residents, pick spouse or child (i.e. their relationship to the head of the family/benefit unit). |
| Birth Date | Enter the resident's birth date in this field. |
| Age | The resident's age is calculated and displayed in this field. |
| Child Status | If the child has never lived on his/her own, has never married and is not a parent of a child living in the household, press <F3> and choose child of household. Otherwise, leave this field blank. |
| Full-time Student | If the child is a full-time student, press <F3> and choose student. Otherwise, choose not student. |
| Paid Child Support | Leave this field blank. |
Use the Edit>Append command or press <Ins> to add the next resident to the table as described above.
Repeat this process for all residents of the household.

Once all the residents of the household have been added on the Residents tab, click the Additional Charges tab.
Use the Edit>Append command or press <Ins> to add an item.
Enter a description (e.g. parking or laundry) and amount for the additional charge.
In the Account field, press <F3> to choose the appropriate revenue account from a select box. See Select Boxes for more information on choosing accounts.
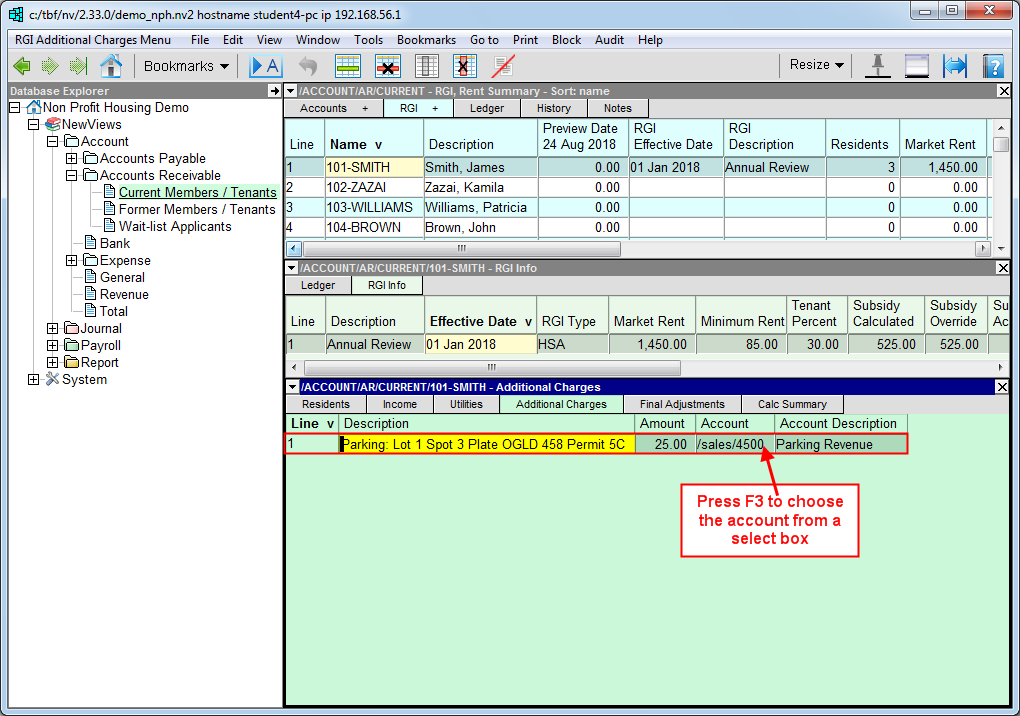
If there are other charges for the household, use the Edit>Append command or press <Ins> to add an item for each charge and fill in the fields as described above.
Note: Additional charges are added to net rent when rent roll transactions are created automatically.