Access the table of items from which information is to be merged into the template. This is generally the table of member/tenant accounts.
Switch to the view of the table that displays the data used by the template you want to use.
Note: It is important to be on the right view BEFORE you start the Mail Merge, otherwise you may receive an error. See Troubleshooting Mail Merge for more details.
For a list of templates provided with NewViews for Non-Profit Housing and the corresponding views of member/tenant accounts, see Sample Mail Merge Templates.

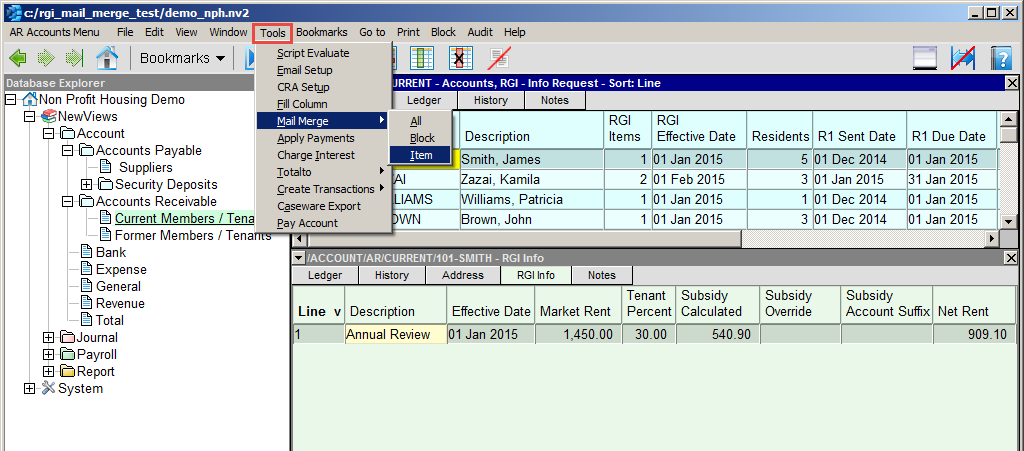
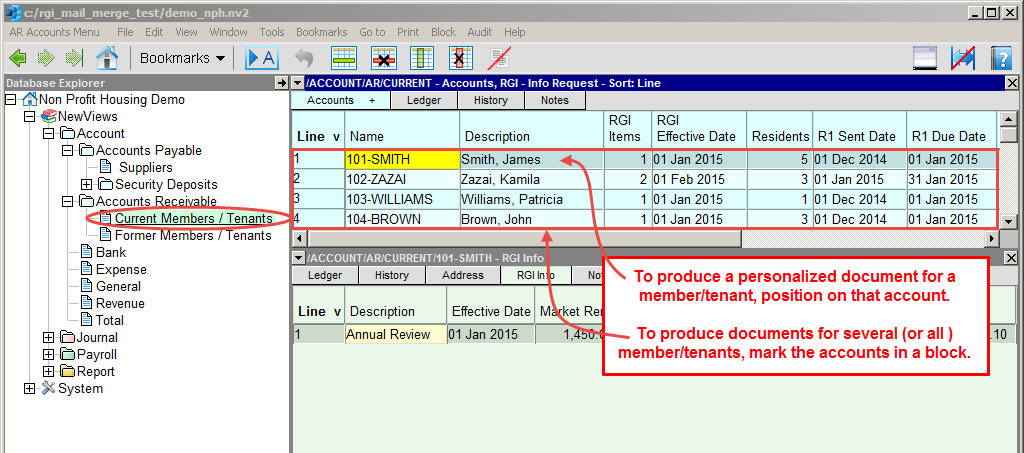
To merge data from only one item, position on that item and issue the command Tools>Mail Merge>Item.
To merge data from several items, mark those items in a block and issue the command Tools>Mail Merge>Block.
To merge data from all the items in the table, position anywhere in the table and issue the command Tools>Mail Merge>All.
The Mail Merge Settings prompt will appear. The settings for the last mail merge are displayed automatically.

If necessary, change the settings by clicking the arrow to the right of Current Settings and choosing the settings for the template you want to use.
For a list of templates and the names of their settings, see Sample Mail Merge Templates.
To use a custom setting for the mail merge, fill in the Mail Merge Settings prompt as described below.
Important! Before you modify the fields in the Mail Merge Settings prompt, you should create a new setting. To do this, click the Copy button. When prompted, give your new setting a meaningful name. This will add your customized setting to the list of available settings.
| Mail Merge Settings | |||
| Setting | Edit Assist Key | Value | |
| Main Document | <F3> | Enter the name of the Word document to be used as a template. | |
| Data File | <F3> | Enter the name of the file that will contain the data extracted from NewViews and merged with the Word template. This file should have the extension .txt. If the file does not exist, NewViews will create it. If the file does exist, NewViews will overwrite it with current data. | |
| Extra Address Name | | This field is not generally used by NewViews for Non-Profit Housing. | |
| Custom Script | <F3> | If any of the nine templates provided for non-profit or co-op housing are used, the nph_rgi_notice_merge.qw_script script must be selected and entered in this field. Custom scripts can also be created for particular needs (contact Q.W.Page for information). | |
| Destination | <F3> | display file printer | display - opens the documents in Word for a preview. email - creates an email file for attachment. file - sends output to the file specified in Filename. printer - sends output to the printer identified by Printer. |
| Filename | <F3> | If Destination is set to file or email, you must specify a name for the output file. Important! See note on Output File Names options. | |
| Printer | <F3> | If Destination is set to printer, output is sent to the printer specified in this field. If the field is empty, output is sent to the default printer set in Windows. Press <F3> to select from a list of available printers. NOTE: To clear the Printer field Press <F3> to select from the list of printers, and click on <Cancel>. | |
| Email Status | <F3> | Controls output based on the email status of accounts from which data is being merged. | |
| blank | Include every item, regardless of the value of the email address for the account. | ||
| inactive | Include only items that have no email address. | ||
| active | Include only items that have an email address. | ||
| Email Setup | <F3> | Press <F3> and a selection window pops up a listing of all Email SMTP server setups. The Tools>Email Setup command provides the settings table to enter your SMTP server settings. | |
| Email From | | Text to be used as the sender of the email. | |
| Email Reply To | | The email account that is to receive reply emails. | |
| Email Bcc (Archive) | | Optional list of blind carbon copy (Bcc) recipients. | |
| Email Subject Line | | Text to be used as the subject of the email. | |
| Email Message | | Text to be used for the body of the email. | |
| Email Log File | <F3> | The name of the file that is to contain email communication success/failure information. | |
Click Continue or press <F5> to proceed with the mail merge.