In the Database Explorer, activate (click on) Current Members/Tenants.
Current Members/Tenants can be found by expanding the following folders: NewViews/Account/Accounts Receivable
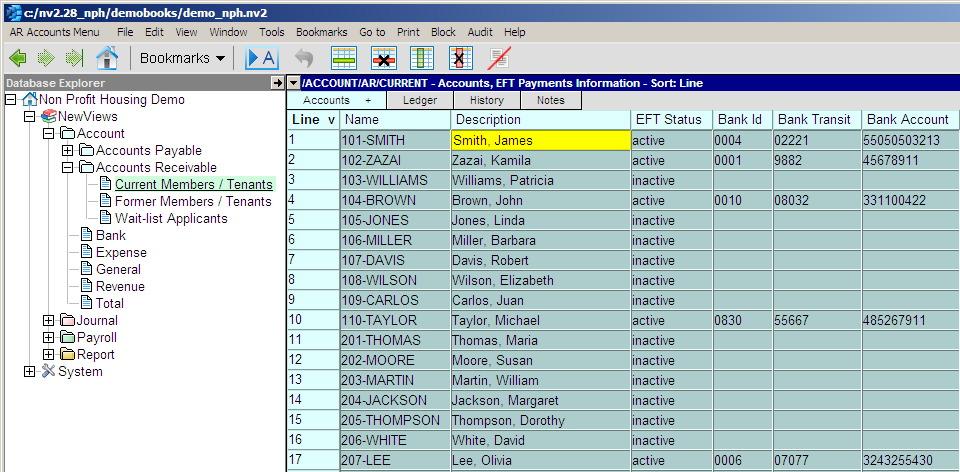
Switch to the EFT Payments Information view by clicking the Accounts + tab and choosing EFT Payments Information.
This view makes it easy to see at a glance which member/tenant accounts have active EFT status.
Use the command Block>All to mark all the accounts in a block.
Pre-authorized debit transactions will only be created for accounts with active EFT status.
Issue the command Tools>EFT Deposit.
The Receive from Customer Settings prompt will be displayed.
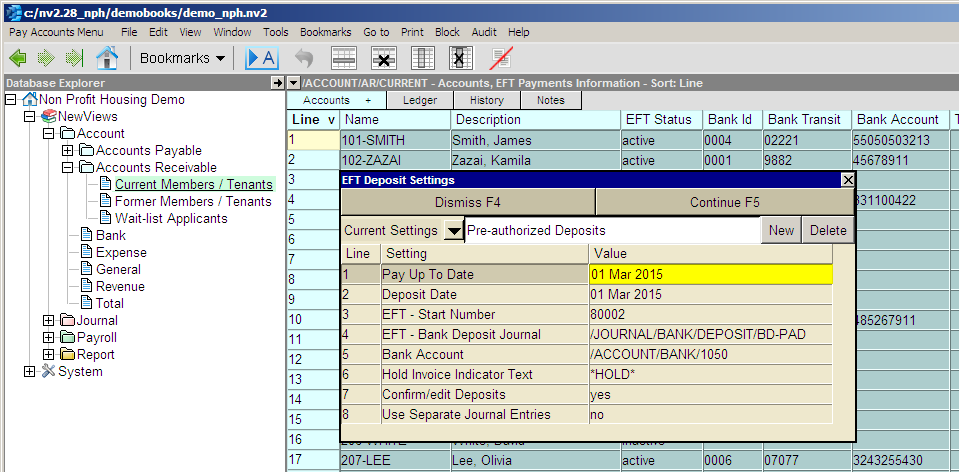
Use the chart below as a guide for filling out the prompt.
| Line | Setting | Values | |
| 1 | Pay Up To Date | Enter the date on which outstanding housing charges for member/tenants with active EFT status are to be determined (press <F3> to select from a calendar). This date is generally the one on which the rent roll transactions were created. | |
| 2 | Deposit Date | Enter the date that is to appear on the deposit transaction(s) (press <F3> to select from a calendar). | |
| 3 | EFT - Start Number | Enter a reference number for the pre-authorized debit transaction. If Use Separate Journal Entries is set to yes, this number will automatically be incremented for each transaction. | |
| 4 | EFT - Bank Deposit Journal | Enter the name of the journal that is to be used for pre-authorized debit transactions (press <F3> to choose from a select box). | |
| 5 | Bank Account | Enter the name of the bank account to be debited (press <F3> to choose from a select box). | |
| 6 | Hold Invoice Indicator Text | Leave this field blank. | |
| 7 | Confirm/edit Payments | If you want to confirm each deposit transaction before it is created, press <F3> to set this field to yes. Other, enter no. | |
| 8 | Use Separate Journal Entries | To create a single journal entry with individual items corresponding to each pre-authorized deposit, press <F3> and choose no (recommended). To create separate journal entries for each pre-authorized deposit, choose yes. | |
Click Continue to create the pre-authorized deposit transactions.
If Confirm/edit Payments is set to yes, a table showing the deposit that will be created is displayed.
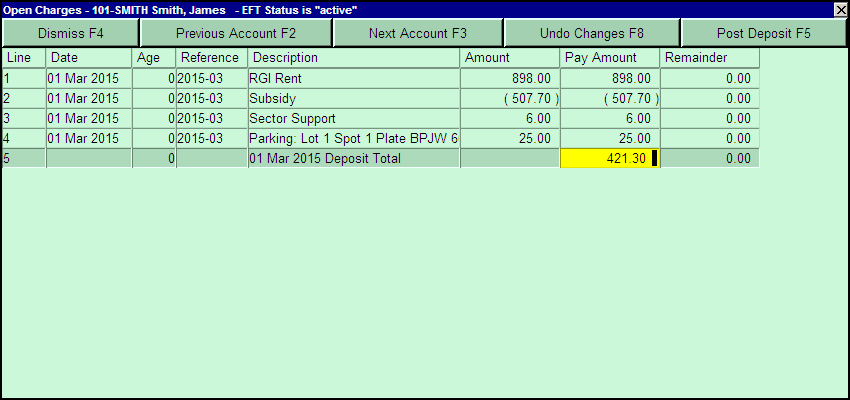
To create the deposit, click Post Payment (or press <F5>), then click Next Account (or press <F3>).
To skip that account without creating the deposit, just click Next Account (or press <F3>).
Once all the deposit transactions have been confirmed, click Dismiss (or press <F4>).
