This page provides the steps for adding a new user. For a more general introduction to the NewViews security model see Setting Up Security.
We assume that you are the administrator and you want to add a new user to the database. If you are not the administrator you likely don't have the access rights required to follow the steps as outlined below. Typically, only the administrator, or a user who has been granted access to the root user object can follow the steps below.
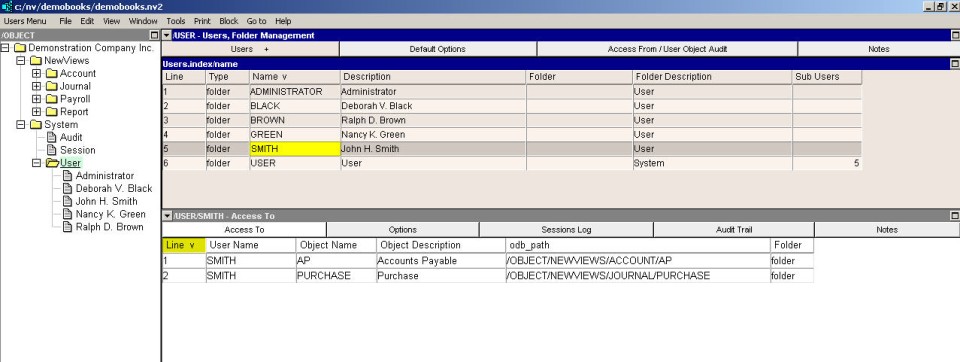
Click on System/User in the main tree explorer in the left pane.
See the figure above. The selected folder in the tree explorer in the left pane is the root user. NOTE: you don't have to expand the root user to display the users as shown in the figure. You can just select it.
Select Users Explorer from the window list in the right pane.
When you clicked on the root user object, the right pane might already be on the Users Explorer view as shown in the figure above. If that is the case you don't need to change the view. Otherwise, click on the button in the top-left corner of the right pane and a window list pops up displaying the available views. Select Users Explorer from the window list.
If you are about to add your first user to the database then the table in the right pane will have only one user, the administrator. The administrator was added automatically when the database was created. As an aside, in that case, you must be the administrator.
Add a user to the table of users in the right pane.
Click somewhere in the right pane to make sure it is the active window. Then press the <Insert> key to add a row. There are also other ways to add a row. For example, you can issue the Edit>Insert or Edit>Append command, or press their keyboard equivalents, <Alt+E+I> and <Alt+E+A>.
Enter a user name and description.
The name should uniquely identify the user. The description can be anything but is typically set to the user's full name, i.e. first and last name. The name and description can be changed later if required.
Enter a user password.
You have to press <F3> on the password field to set the password because a password must be entered twice for verification.
You don't have to enter a password at this time but it's a good idea to do so. If the password is not set, then anyone who knows the new user's name will be able to log into this database without entering a password.
Leave the Access View and Audit View set to no.
These fields control whether access and audit views will be added to the windows lists of the new user's windows. Typically you want these views only for the administrator, so leave them set to no. They can be changed later if required.
Grant the user some access rights.
Set the user's options.
See Setting User Options.