Running the NV1 Import Program
To run the NV1 Import program:
-
From the Windows start menu button issue Start>Programs>NewViews 2.0>NV1 Import.
The NV1 Import program is run and the following prompt window is displayed:
-
Select the directory (folder) in the directory field.
Type the path to the destination directory that is to contain the NV2 books (or click the
<Select> button to choose it from a file explorer).
The directory you choose should already contain the export file (NV1_NV2) that was generated
by the NVEXPORT procedure.
NOTE: If you want the NV2 books to be created in another directory, you must first
copy the file called NV1_NV2 from the directory containing the NV1 books to the new
destination directory.
-
Set the Batch Limit fields as required.
Normally you do not need to change the batch limits.
Do not change the batch limits unless directed to do so by a
Q.W.Page technical support representative.
-
Click the <Begin Import> button.
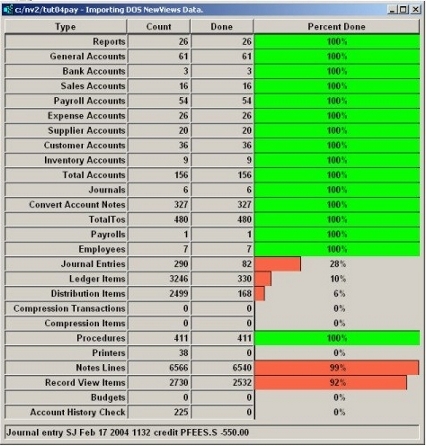
After you click <Begin Import>, a window will appear to display the
progress of the import.

Controlled Interruptions
The NV1 Import program can be interrupted in a controlled fashion by clicking the
<Stop> button.
When the import is interrupted in this way, all the data that has already been
imported is saved in the NV2 books.
The import can be resumed at any time by running the NV1 Import program again.
Power Failures/Computer Crashes
If the NV1 Import program is interrupted by a power failure or a computer crash,
follow these steps (once the computer is back up and running):
-
Using Windows Explorer, or the DOS DEL command, delete file database.nv2 from the destination directory.
-
Check to see if a directory called BACKUP was created in the destination directory
for the NV2 books. If not, proceed to step 3.
If the BACKUP directory exists, it means that the NV1 Import program was able to save
at least one batch of imported data before it was interrupted.
In this case, copy the database files (database.*) and the file NV1_NV2.control from the BACKUP
directory to the destination directory for the NV2 books.
-
Run the NV1 Import program again.
What is Backed Up
At the end of each batch the database file database.nv2 is copied to
a backup directory.
The file NV1_NV2.control is also backed up.
This file contains information required by the importer to start
the next batch.
When the import is complete a final backup is made to the backup directory so that you have a backup copy of the
completed books.
Backup Location
The backups are made to a folder called BACKUP located as a sub-folder of the
destination folder. For example, if the database you are importing is located in
c:/nv/mybooks then the backup directory would be c:/nv/mybooks/BACKUP.
Changing The Backup Location
The directory path that backups are made in is sufficient in most cases. If however, you wish
to specify an alternative backup location, you can:
-
Click the Windows <Start> button
-
Move the mouse pointer to the choices under Programs>NewViews 2.0
-
Right-Click on NV1 Import and choose Properties
-
Click the "Shortcut" tab
-
Click on "Target"
-
At the end of the command line add a space followed by -backup_path <path> where
<path> specifies the drive/directory path you want the backups to be stored in.
Note: The path cannot contain spaces.
-
Click the <OK> button
Some Warnings
If you change the backup location as described above, be advised that:
-
The location you specify will be used for all NV1 books that you convert. This means
that the final backup for the 1st set of books you convert will be overwritten
by the backups for the 2nd set, etc.
-
If you attempt to import multiple sets of books simultaneously, then the backups
will "collide" - potentially causing the import of one or more of
the books to fail. And, if an import does fail, you likely won't have a backup
to resume the import with.
Copyright (c) 2003-2026 Q.W.Page Associates Inc., All Rights Reserved.