Before adding vendor accounts you should be familiar with the general concepts involved. In particular see the section Adding Accounts.
Vendor accounts are added to the Account Setup window of an Accounts Payable report.
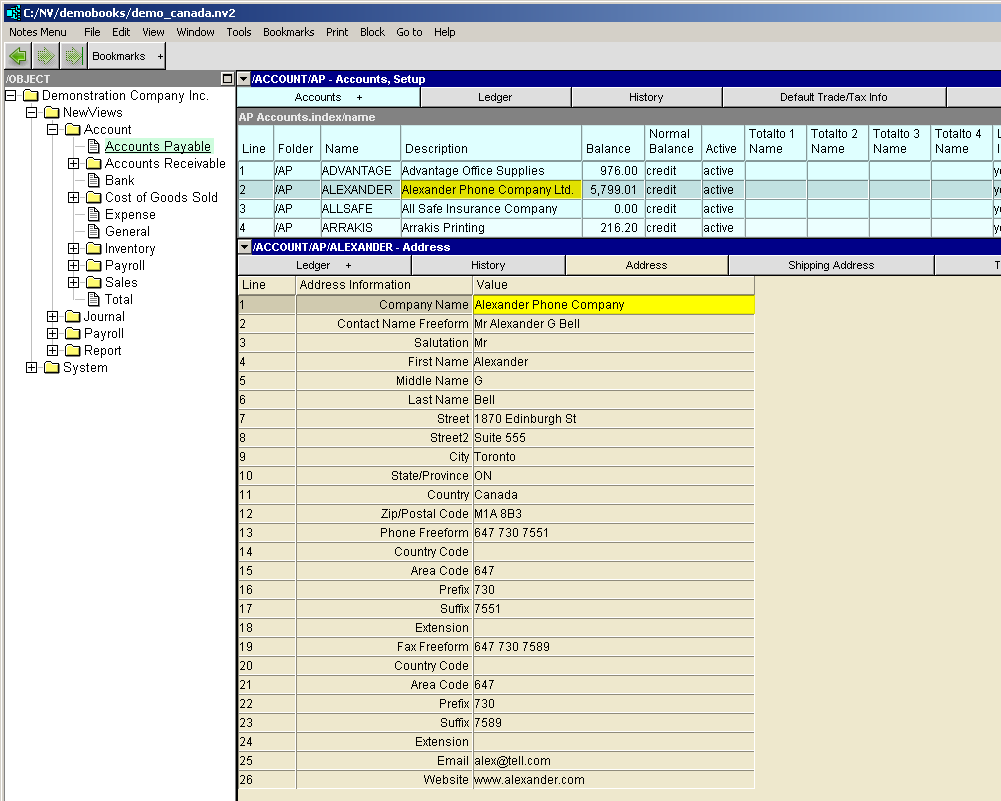
Click the Accounts Payable report (i.e. NewViews/Report/Accounts Payable) in the NV2 Database Explorer.
If the top right window is not the Account Setup window, click the window list button at the left of the title bar that reads /REPORT/(report name) and choose Account Setup.
Activate the line above or below where you want to add the new account. (This step is not crucial as the account can always be moved later, see Moving Accounts for more information.)
Issue the command Edit>Insert to add the new account above the active line or Edit>Append to add the new account below the active line.
NOTE: The positioning of the new account is only an issue if the report is sorted by line (interactive) order. If the report is sorted by account description or name order, the Edit>Insert and Edit>Append commands can be used interchangeably since the account will automatically be placed in the proper position.
In the Account Type field, press <F3> and select Accounts Payable (press <Enter> or double click to select).
In the Name field, enter the vendor's account name. You can use any combination of letters, numbers, hyphens and underscores, and the name can be as long as you want. Account names are automatically converted to upper case characters. NOTE: You cannot have more than one vendor account with the same account name.
In the Description field, enter the vendor's description (usually the company name). You can use any combination of letters, numbers, spaces or special characters and the description can be as long as you want.
When you enter AP (Accounts Payable) in the Account Type field, credit is automatically entered in the Normal Balance field, perpetual is entered in the Normal Rep field, and active is entered in the Active field. The name of the Accounts Payable report (e.g. AP) is automatically entered in the Report field when the new account is first added to the report.
Enter the appropriate total account names in the Totalto Name fields to ensure that the report totaling structure includes the new vendor account. See Report Arithmetic for more information on totaling.
The new vendor account will automatically be saved when you move off the line. At this point, postings can be added to the account, and the total accounts payable account and all related accounts and reports will be updated immediately.
You can add the vendor's address information now or later. To add address information, activate the vendor account and then use the window list button in the bottom right pane to choose the Address Information window.
You can accept the default trade tax settings for the vendor account, or you can override these defaults. To override the default trade tax settings, use the window list button in the bottom right pane to choose the Trade Information window and make any required changes. See Trade/Tax Settings for Vendor Accounts for more information.
The Report field can be used to move the account from one report to another (e.g. if you have more than one AP report and want to move a vendor account from one report to another). For more information see Moving Accounts.
The T field is blank for vendor accounts. This field displays the number of accounts that total to any total account on the report, this is generated automatically. For more information, see Report Arithmetic.
If you have additional information you want to store for a vendor (e.g. alternative contact information, hours of business, etc.), you can add it to the Notes window for that vendor account. Use the window list button in the bottom right window to access the Notes window.
NOTE: Vendor accounts can be added to both the accounts Payable (AP) account table and reports.