To add a purchase to a vendor account:
Click Accounts Payable accounts (NewViews/Account/Accounts Payable) in the NV2 Database Explorer.
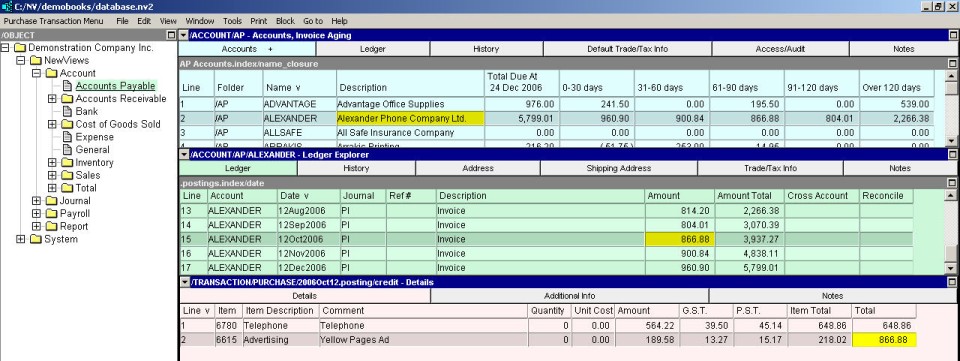
Activate the vendor account to which the purchase invoice is to be added, then press <F6> or click anywhere in the Ledger Explorer (middle pane).
Press <Alt+E+A> or issue the command Edit>Append to add a new item to the ledger.
If the Purchase Invoices journal (PI) is not specified in the Journal field, activate the Journal field and press <F3> to select the Purchase Invoices journal (press <Enter> or double click to select the journal name).
NOTE: You can preset the Journal field using the Edit>Default Value>Set command, see Default Data for more information.
Enter the invoice date (press <F3> to select), reference and description (usually Invoice), in the Date, Reference and Description fields, respectively.
Do not enter the Amount or Amount Total, since it is generated automatically and leave the Cross Account field blank.
Activate the transaction detail table by pressing <F6>.
Press <Alt+E+A> to add an invoice item.
Enter the account name for the item, type it in or press <F3> to select, and enter the description for the item.
If you are tracking quantities for the item, fill in the quantity and rate (if it does not appear automatically) and the net amount will be calculated automatically.
If you are not tracking quantities, fill in the net amount for the item.
Taxes are calculated automatically, as is the item total amount.
The Additional Info tab on the individual invoice(s) and order(s) can be used for additional information.
Repeat steps 8 - 11 for each invoice item.