Click the payroll to which the employee is to be added (i.e. NewViews/Payroll/Canada Payroll/Weekly Employees) in the NV2 Database Explorer. NOTE: You can only add employees to the payrolls at the deepest level. For example, you cannot add an employee to NewViews/Payroll/Canada Payroll because there are payroll levels (sub-payrolls) below it. Click the + to expand the levels until you reach a payroll that does not have a + to the left of it.
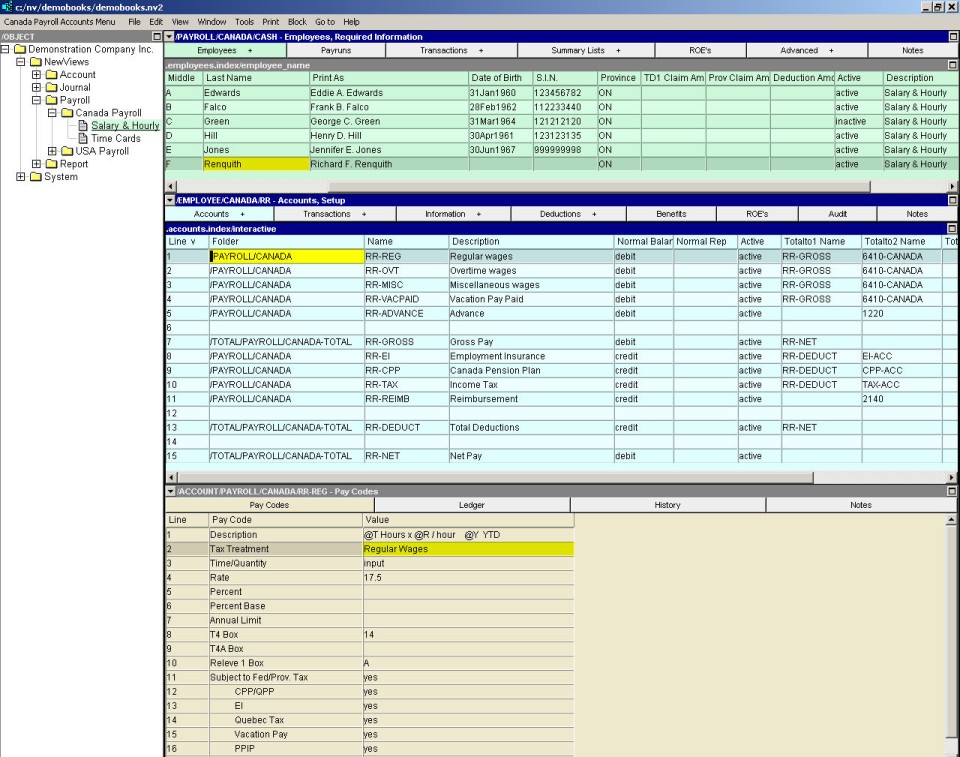
If in the top right window the Employees window tab is not selected (i.e. not green), click the employee window tab and select Required Information.
Employees can be added to any view of the employees table, however the Required Information view contains columns for the minimum required information such as Social Insurance Number, date of birth, TD1 claim amounts, etc.
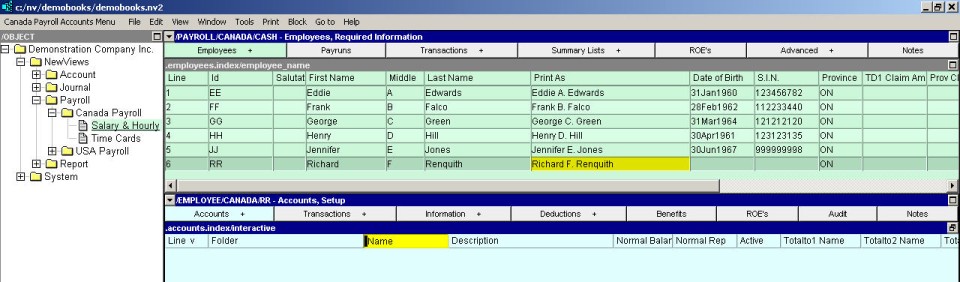
Issue the command Edit>Insert to add the new employee above the active line or Edit>Append to add the new employee below the active line. NOTE: The positioning of the new employee is only an issue if the table is in line (interactive) order. If the table is in Id or last name order, the Edit>Insert and Edit>Append commands can be used interchangeably since the new employee will automatically be placed in the proper position.
In the Id field, enter the Id for the employee (e.g. the employees initials, or an employee number). NOTE: You cannot have two employees with the same Id.
Enter the employees last name, first name, and initial (optional) in the Last, First and Middle fields, respectively. The Print As field (used for printing the employees name on paychecks) is generated automatically, but can be edited if required. The new employee is recorded by issuing the File>Save command or moving off the line. See also the Required Information window.
Activate the account table by selecting <F6> or by clicking anywhere in the middle pane (blue background).
Issue the Tools>Copy Existing Employee Accounts command to poach another employee's setup, or issue the Block>Paste command and select the "SAMPLE - TIMECARD" or "SAMPLE - NON-TIMECARD" setting.
NOTE: For information on adding the accounts yourself, see Adding Accounts and Report Arithmetic.
Edit the pay codes for each account as required. If pay codes for the active account are not displayed in the bottom pane, use the window tabs to switch to the Pay Codes window.