A cash drawer account is a general ledger account with a debit normal balance. For information on adding a general ledger account to a set of books, see Adding General Ledger accounts.
Adding cash drawer sales involves crediting one or more sales accounts and any applicable tax accounts, and debiting the cash drawer account. With NV2, you don't have to be concerned with debits or credits when entering cash drawer sales. You simply specify the cash drawer account you are using, and the details of the items you are selling. Trade taxes, if applicable, are calculated and added automatically.
Cash drawer sales can be added to the Sales Invoices Journal, or they can be added directly to the cash drawer account. When you add sales to the Sales Invoices Journal, postings are made automatically to the cash drawer account, to the sales accounts that correspond to the items sold, and to any applicable tax accounts. When you add sales directly to the cash drawer account, postings are made automatically to the corresponding sales and tax accounts, and a journal entry is created in the Sales Invoices Journal.
The choice of entering cash drawer sales in a journal or in the cash drawer account is completely up to you; the end result is identical either way.
Important! In order for trade taxes on cash drawer sales be calculated correctly, you must first set up the default trade taxes for sales (see Trade Tax Settings for Sales for more information). However, you can always edit tax amounts on sales (e.g. special circumstances for a particular sale that affects the tax calculation).
Periodically, the cash drawer account is cleared and the bank account is brought up to date by adding a transaction to credit the cash drawer account and debit the bank account.
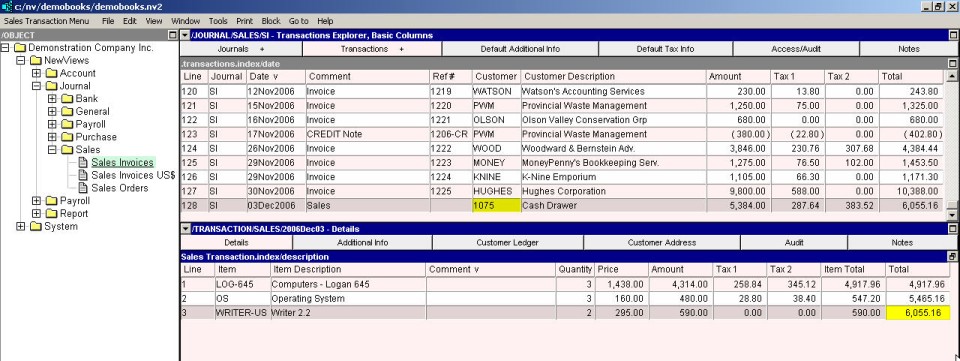
To add cash drawer sales to the Sales Invoices journal:
Click the Sales Invoices Journal (NewViews/Journal/Sales/Sales Invoices) in the NV2 Database Explorer.
If the right window is not the Transactions Explorer window, click the window list button at the left of the title bar that reads /JOURNAL/SALES/SI and choose Transactions Explorer.
Press <Alt+E+A> or issue the command Edit>Append to add a new sale. (NOTE: The line number is generated automatically.)
Enter the sales date (press <F3> to select), comment (usually "Sales") and reference, in the Date, Comment and Ref# fields, respectively.
In the Customer field, enter the cash drawer account name (type the account name or press <F3> to select). The cash drawer account description is filled in automatically. Do not enter anything in the Net, GST, PST or Total fields, since they are generated automatically.
Activate the transaction detail table by pressing <F6>.
Press <Alt+E+A> to add a sales item. Enter the account name for the item (type the account name or press <F3> to select) and the item description. If you are tracking quantities for the item, fill in the quantity and rate (if it does not appear automatically) and the net amount will be calculated automatically. If you are not tracking quantities, fill in the net amount for the item. Taxes are calculated automatically, as is the total amount.
Repeat the previous step for each sales item.
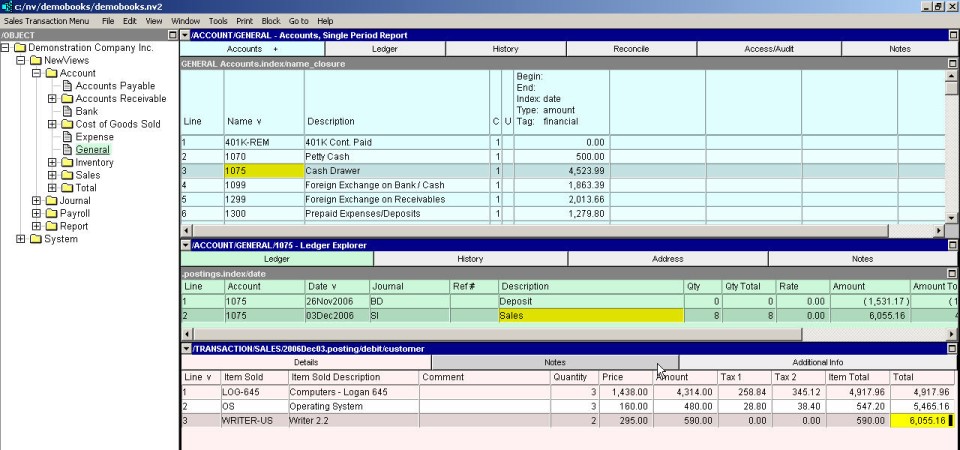
To add sales to the cash drawer account:
Click general ledger accounts (NewViews/Account/General Ledger) in the NV2 Database Explorer.
Activate the cash drawer account, then press <F6> or click anywhere in the account ledger (middle pane).
Press <Alt+E+A> or issue the command Edit>Append to add a new item to the ledger. (NOTE: The line number is generated automatically.)
If the Sales Invoices journal (SI) is not specified in the Journal field, activate the Journal field and press <F3> to select the Sales Invoices journal (double click to select the journal name). NOTE: You can preset the Journal field using the Edit>Default Value>Set command.
Enter the sales date (press <F3> to select), reference and description (usually "Sales"), in the Date, Reference and Description fields, respectively. Do not enter the amount, since it is generated automatically. Leave the Cross Account field blank as well.
Activate the transaction detail table by pressing <F6>.
Press <Alt+E+A> to add a sales item. Enter the account name for the item (type the account name or press <F3> to select). The item description is filled in automatically. If you are tracking quantities for the item, fill in the quantity and rate (if it does not appear automatically) and the net amount will be calculated automatically. If you are not tracking quantities, fill in the net amount for the item. Taxes are calculated automatically, as is the item total amount.
Repeat the previous step for each sales item.