Here we describe tips and techniques that might otherwise be overlooked because they don't belong to a specific topic, or they are buried within another topic. Users may often use software for years without being aware of features they could have used all along. When they find out, the usual response is "I didn't know you could do that!" To avoid this, review these tips and techniques and re-visit them from time to time.
The <F3> key might become your best friend. It's always harmless and always useful. <F3> displays allowed values for the current field and just seeing what is allowed tells you a lot. Some experienced users press <F3> instead of asking for help. You can always cancel without selecting a value by pressing <Esc>. Even if there are no allowed values, or if the field cannot be changed for some reason, an error message is displayed, and this can also be informative. The form of the display adjusts to the type of field:
Lists of allowed values.
<F3> on many fields offers a short list of allowed values. The list may be as simple as Yes/No, or Open/Closed, or it may be a longer list, such as available date formats, or employee earnings or deduction types.
Selecting from large lists.
Some fields require a selection from a long and potentially extremely large set of objects. Examples are the selection of a vendor or customer for an invoice, or a sales account for an invoice item detail. <F3> pops up a table with the relevant accounts that can be selected. The column for the current table order will be highlighted, indicating that the current row adjusts as characters are typed. This is a form of auto-completion that limits the number of characters necessary to pick an object. You can also switch the table to a different sort order if that is preferred. See Click on column titles to switch sort order and Sorting forward and backward.
Date Fields
<F3> will pop up a calendar. If the field already has a date, the calendar will be positioned on it. Otherwise it will be positioned on the system date. You can move around on the calendar and press <Enter> or <double-click> to pick a date.
Number fields
<F3> does not work on number fields but you can enter an expression directly into the field. For example, if you type 2.5*3, the value 7.5 will be entered. You can even use parentheses. For example, type (2+3)*7 and 35 will be entered.
We anticipate that in addition to the ability to enter expressions, future versions of NV2 will pop up a calculator when <F3> is used on a numeric field.
When <F3> is not allowed.
Some fields do not allow <F3>, but always for a good reason, and that reason will be apparent in an error message and the help on that error. For example, you cannot press <F3> on the User field of a workstation login row because presenting the list of users for a database would be a security breach. <F3> on the Line column also displays an error because the line number in controlled by the system and cannot be edited. Note however, that in each case <F3> tells you something about the field and it does no harm.
Tables can have a number of different sort orders and you can often change the sort order by clicking on a column title. The title that represents the current order will have a small arrow indicating whether the current order is ascending or descending.
Even more sort orders are often available using the View>Sorted By command.
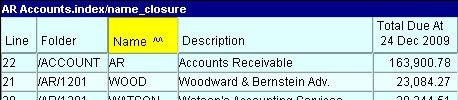
NOTICE: The double chevron in the Date ^^ column title. A double chevron is the instant visual clue that the items displayed are gathered up from all the underlying journals and presented in date order (reverse date in this case - "^^" is reverse order, "vv" is forward order). Clicking the column title will toggle the order forward and backward. See Closure and Transactions for more.
Of course not all columns are associated with a sort order. When you click on a column that has no order, the click is ignored.
Whenever you are on an account's green ledger you can switch the order by clicking on the column title of the line, date, reference, description, or reconcile field.

Did you know that all postings in the database can be seen in one place? The ledger table of the root account displays all postings in the database. Select the root account folder in the tree explorer and click on the ledger tab, or use the window list button to switch the right pane to the Ledger Explorer. All postings in the database are displayed. Now click on the title of the date, reference, description, or reconcile column to see every posting in the database instantly switch orders. This ability can be extremely useful for finding information, tracing the source of a problem, or simply detecting data entry errors.
Of course you might not have access to the root account. But the same technique works everywhere. Suppose you do have access to the customer accounts. Position on the ACCOUNT/AR account and switch to the ledger explorer in the bottom pane. Every customer posting in the database will be displayed in a single table and you can switch the order at will.
You can drill down with a double click on any table row.
Double clicking a table row is the same as pressing
Double clicking a workstation login row is the same as pressing
Double clicking a table column title is the same as pressing
Double clicking an account table multiple column analysis column title is the same as executing a View>Analysis>Multiple Column Setup command.
Double clicking an account history table column title is the same as executing a View>Analysis Settings command. Double clicking a cell on a table with numbered fields (e.g. print and tool prompts, Tax Info, etc.) is the same as pressing
See Mouse Shortcuts for more.
A quick and easy way to insert today's date into any date field in a set of books is to type the letter t, then press Enter.
All numeric fields have an embedded calculator - this means you can type a mathematical expression and NewViews will automatically calculate the result and enter it in the field. For example, if you type 2.5*3 in a numeric field, the value 7.5 will be entered. You can also use parentheses for more complex calculations. For example, if you type (2+3)*7, the value 35 will be entered.
All date fields have an embedded calculator - this means that you can use the + and - keys to add or subtract a specific number of days, weeks or months to a date. For example, entering t+30days in a date field will enter a date that is 30 days from today, t+6weeks will enter a date that is 6 weeks from today, etc. You can also edit an existing date by pressing <Esc><End> and then using + or - to change that date by a specific period. For example, if you edit the date 24May2014 and change it to 24May2014+3weeks, the resulting date will be 14Jun2014.
The Tool>Fill Column command copies the contents of a field to the same field on every item in a block. This tool is commonly used to fill a column with the same data. For example, you can use Fill Column to enter the same account name in the Total to field on a group of accounts on the setup view of a report. Also, on a selected block of payroll accounts, you can use Fill Column to enter the same hourly rate in the rate field.
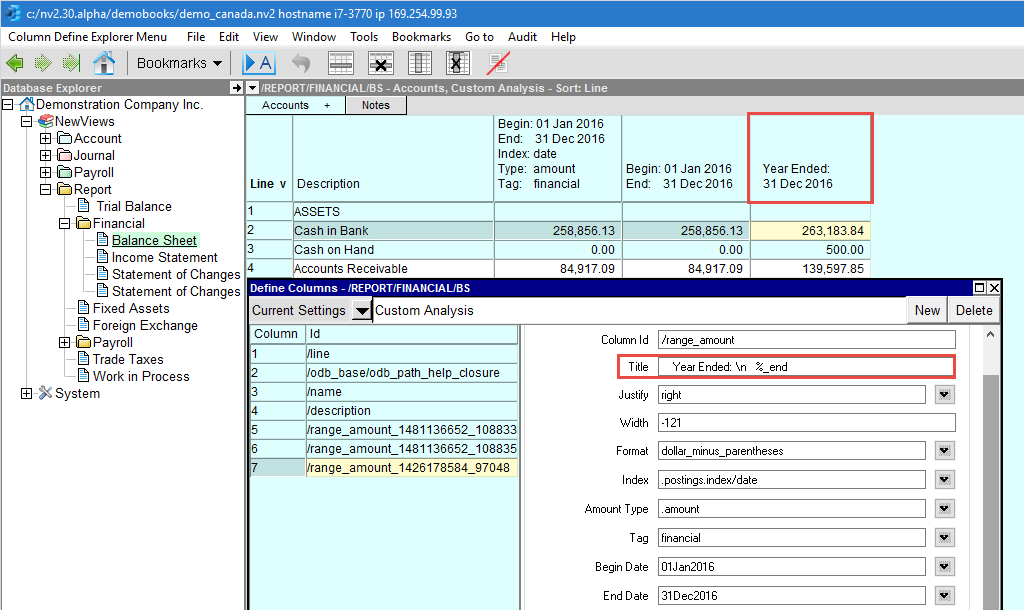
You can control the amount column titles (on blue account tables) by substituting data from the column definition into text you enter. For example, now a balance sheet amount column could be titled "Year Ended: %_end" and when the column defined period End Date changes, the new date will be substituted in place of "%_end". All data entered to define a column (using Window>Define Columns or <F3>) can be substituted this way into text of your choosing. See Titles for details.
Discontiguous blocks, also known as non-adjacent blocks (or cells, or ranges), are used to mark multiple blocks of items when the items are not all side by side in one group.
Blocks of items are marked with the mouse by activating a row and, while holding the mouse button down, dragging the mouse up or down. The marked (selected) items are highlighted. To mark another block just repeat the above steps. Note that the active row (the row with a yellow cell and a cursor) is the "anchor point" for marking blocks by dragging the mouse. To mark additional blocks, just move the cursor - with a mouse click or keystrokes - and drag the mouse from the new anchor point.
Individual items can also be selected (or deselected) by left mouse button clicking the row while holding down the <Ctrl> key.
Blocks of items can also be are marked with the keyboard, by moving the active cell while holding down the <Shift> key. To mark another block just repeat the above steps.
Either mouse or keyboard methods can be used interchangeably.
A horizontal scrollbar is present when the number of columns are wider than the window. This can be very annoying with Select Boxes and Printing Prompts. To remove the scrollbar, increase the width of the window by stretching the window's side pane.
Select the Microsoft "Start" menu and click on "Control Panel".
Click on "Printers and Other Hardware" and "Keyboard". If you don't see "Printers and Other Hardware", you probably have your Control Panel in "Classic View". If this is the case, simply click on the "Keyboard" icon.
Look at the "Repeat Delay" option. "Repeat Delay" designates the amount of time that separates the first repeated key stroke from the rest. For example, if you press and hold the "down arrow" key, the amount of time between the first and second "down arrow" signals sent to your computer is affected. Slide the bar closer to "Short" to squeeze this initial delay.
Find the "Repeat Rate" option. Increasing the "Repeat Rate" causes key strokes to appear faster when holding down one key. Slide the bar closer to "Fast" to increase the rate of cursor movements.
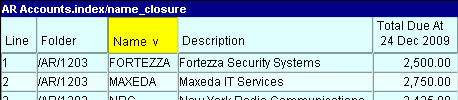
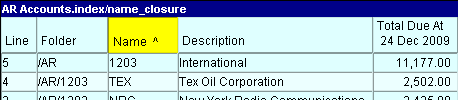
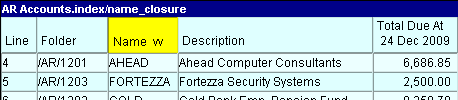
Left-click on the column titles to switch orders. But if the table is already in the order associated with the column, then the order flips from ascending (forward) to descending (backward) or vice versa. An arrow in the column title flips to indicate whether the current order is ascending or descending.
Block a group of accounts. Position the cursor in the column by which the data will be sorted, any row in the block, it doesn't matter.
You can change the order of the accounts on a blue table by running the script sort_interactive.qw_script which can be found under c:/nv/nv2.dat/scripts. Note, we are assuming the NewViews was installed in folder c:/nv.
Suppose your top pane is on a blue table of an account and the bottom pane is displaying the green table of postings in date order. As you position on different accounts in the top pane, the postings in the bottom pane switch to match the account. In this situation it is more useful to display the posting in descending order, placing the most recent postings at the top. Not only will you see the number of postings on each account in the Line column, but you will also see the account balance in the Amount Total column (and quantity balance in Quantity Total if displayed). The green table in the bottom pane provides more useful feedback as you move through accounts in the blue table in the top pane.
The current action on many tables tends to occur at the end of the table when in ascending order or at the top when in descending order. This gives you the option of working at the top, and many users prefer this. And it has the advantage of displaying total counts and balances as described above. You may find that descending order is also more useful for any tables that have a date order, such as sessions, audit trails, journals, and so on.
In addition to sorting by clicking on a column title, you can <Ctrl+Click> the left mouse button on some column titles. If <Ctrl+Click> is allowed, the sort order changes as usual, but the column is also highlighted. When the column is highlighted you can move quickly to a specific row by entering keystrokes.
Suppose you are on a blue table of accounts. Suppose there is a very large number of accounts and you want to position on a specific account quickly, without scrolling to it. <Ctrl+Click> (left mouse button with the Ctrl key held down) on the title of the Name column to highlight it. This also switches to the name order if not already in that order. The current position moves to the first table row.
Now as you start typing, the current row moves according to the characters entered. For example, when you enter 6 you move to an account such as 6200. As you keep entering characters the current position continues to home in on the target account. After entering three characters such as 642 you might be positioned on account 6420, for example.
Pressing <Backspace> will undo the effect of the last keystroke effectively reversing the positioning until eventually you are back to the first row. Or you can press <Home> to undo all keystrokes at once and re-start from the first row immediately.
When you reach the desired account just <Ctrl-Click> on the column title to turn off the highlighting. Note that in many cases you will not have to enter the entire account name. When you get "close enough", turn off the highlighting by Ctrl+Clicking on the title to turn highlighting off, and then click on the account you want.
The previous example used the Name column to move to an account quickly by name with minimum keystrokes. But you can use this technique on any column that can be highlighted. For example, a journal (pink table) may have a large number of transactions and you might want to go to a particular date quickly. The same technique described in the account name example is used. Ctrl+Click on the date column to highlight it and then start entering the desired date.
However, the date must be entered in YYYYMMDD format. That is, the year must be entered as four characters such 2010, followed by two characters for the month and two for the day. Enter the characters this way regardless of how the date is displayed. The date is usually displayed is a formatted manner according to a format selected in a user option. But to "home in" on a particular date in a reasonable manner, you must start with the year, then month, then day. If you think about it, trying to enter the day first would really not make sense when homing in on the date.
This technique will also be useful for homing in on account postings (green table), which are also sorted by date.
When you are on a journal's table of transactions (pink) or a ledger's table of postings (green), you can sort by id index (order entered) by clicking on the word Line in the top row.
Most users have been adding transactions to journals and ledgers while on the date index. That is largely because the date index is set for a journal's transaction table by default when NewViews comes "out of the box".
Sorting by Date is fine but be aware that newly added rows move to their correct position according to the transaction date entered. This can be confusing unless you know what's going on. Although a user might expect new transactions to be appended, they instead move to their correct position according to the date. This can be somewhere within the table, not near the end as expected.
Sorting by Line (id index) can solve this sometimes annoying situation. All objects, including transactions, have a unique internal object id and transactions can be sorted by this id. Click on the word Line in the top row of the journal or ledger. The object ids are always bigger for new transactions so when you sort by id they are always arranged in the order they were created. New transactions will always be appended and your transaction entry will be more stable visually.
In fact, you might want to switch to the id index (sorted by Line) just to take a look, regardless of how you prefer to enter transactions. It will always display all transactions in exactly the order they were created and that is a potentially useful feature for a journal or ledger in any case.
The technique of highlighting columns is useful for homing in on a target row, but if you already know where you want to go you can issue the Go to>Item command. A window will pop up to collect the key for the target.
The information collected will depend on the sort order. For example, if you are on a green ledger and you click on the date column, therefore sorting by date, then a date will be collected will you issue the Go to>Item command. If you click on the description column, therefore sorting by description, then Go to>Item will collect a description.
The Bookmarks button allows you to bookmark (called "Favorites" in Internet Explorer) a position, view or window arrangement that you can return to at any time.
See Bookmarks for more.
The <F5> key can be used to commit or save the current row (or window) without having to move off the row.
In cases where formula columns are not refreshed automatically, you can press <Ctrl+F5> to "hard refresh" the data, i.e. reload the most current data from the server.
NV2 presents error messages in a tree. Messages toward the top of the error window are more general, and messages become more specific lower in the window. For example, a message near the top of the error window might be "Could not change the transaction date", but a message further down in the window might be "You cannot change the transaction because it has been reconciled".
Error messages can be a learning opportunity if you ask for help. Error help is structured, changing from more general to more specific as you move down the help. Help has the following advantages:
Provides a more detailed explanation of the error.
May offer insight into why such an operation is not reasonable in the current context.
May recommend an alternate approach to performing an operation.
May offer links into the manual.
Within each windowpane, the size of the text may be enlarged or reduced by using the
mouse wheel in combination with the control key on the keyboard. Similarly, the text
of this manual may also be increased.
On some computers using the mouse wheel to change the size of the text of the manual
does not work. In this case, you can change the size of the text by clicking on the
Font icon located on the menu bar at the top of this windowpane.
The scroll wheel (or mouse wheel) generally moves the active window vertically. If you have a mouse with a second scroll wheel, or a tilting wheel, use it to move the active window horizontally when a horizontal scroll bar is present.