


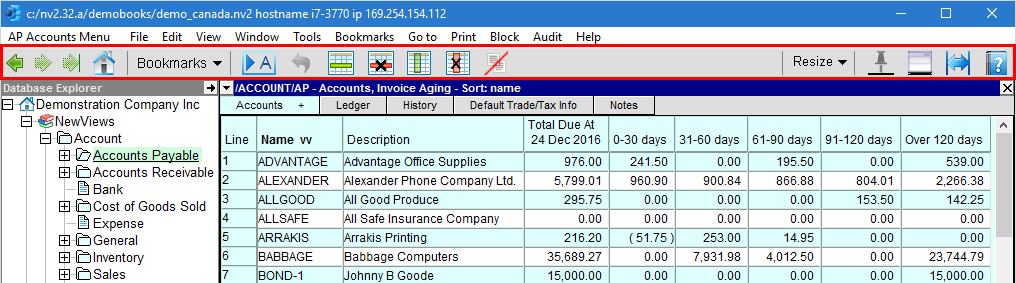
The toolbar is located near the top of the NewViews desktop, just below the menu bar. The toolbar provides shortcuts for navigation and other frequently executed actions.
There are three (3) buttons for Back, Forward and Forward End navigation. These buttons allow you to step backwards and forward through locations you have accessed in the books.

| Navigation Buttons | |||
| | Back | <Ctrl+Shift+B> | Click the Back button to retrace your path to a previous location, position, view, and/or window, one view at a time. |
| | Forward | <Ctrl+Shift+F> | Click the Forward button to reverse direction and return, one position/view at a time, to the place where you first used the Back button. |
| | Forward End | <Ctrl+Shift+E> | Click the Forward End button to reverse direction and return, to the position/view where you first used the Back button. |
As you navigate in a NewViews set of books, "breadcrumbs" are dropped each step of the way.
A breadcrumb is set each time:
A folder is activated in the Database Explorer.
A window restore state is changed.
A window tab is used to view different data.
A Bookmarks>Go to... command is executed.
A table sort order/direction changes.
If a change to a table is made (i.e. a row is deleted), the breadcrumb will change reflect this change.
A trail of up to one hundred (100) breadcrumbs is kept. Once the maximum is reached, each new breadcrumb will remove the "oldest" breadcrumb, keeping the trail at a length of 100.

Clicking the <Go Home> button will collapse all the folders in the Database Explorer and maximize the Database Explorer window pane.
Note: The <Go Home> button is only available to users with unrestricted access to the books.
The <Bookmarks> button allows you to bookmark a position, view or window arrangement that you can return to at any time.
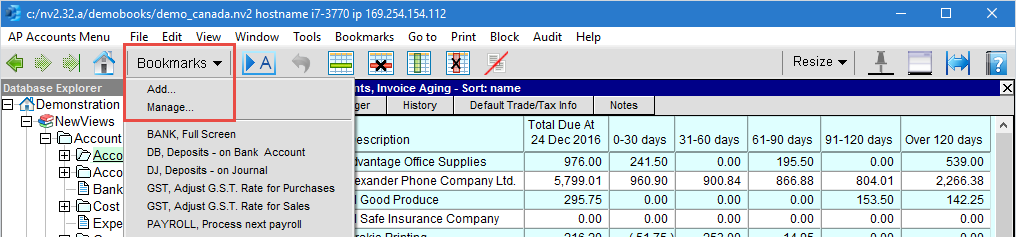
Bookmarks can be managed by clicking on the Bookmarks button, then clicking on Manage. Alternatively, the menu command Bookmarks>Manage can be used for faster access via the keyboard.
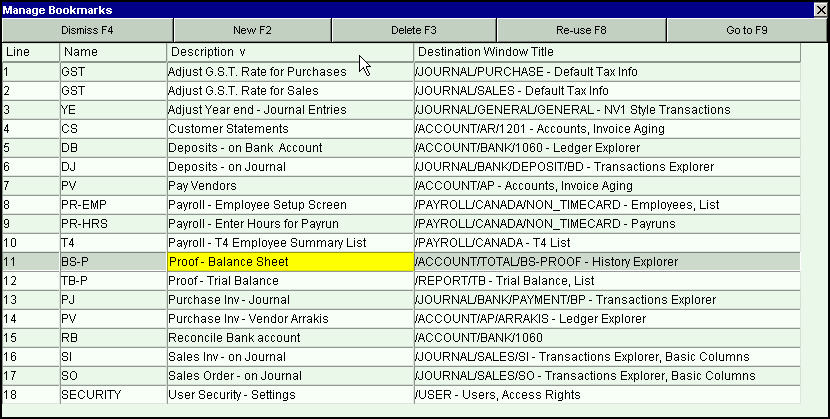
A sample Bookmarks Manage window appears below.

There are five (5) buttons at the top of this Bookmarks Manage window:
| Bookmarks Manage Command Buttons | |||
| Dismiss | <F4> | Dismiss the window. (Any changes made were saved automatically as they occurred.) | |
| New | <F2> | Create a new row for a new bookmark to record the current position. | |
| Delete | <F3> | Delete the bookmark for the active table row. | |
| Re-use | <F8> | Re-use the bookmark for the active table row, replacing it with the current position. | |
| Go to | <F9> | Go to the bookmark position for the active table row. | |
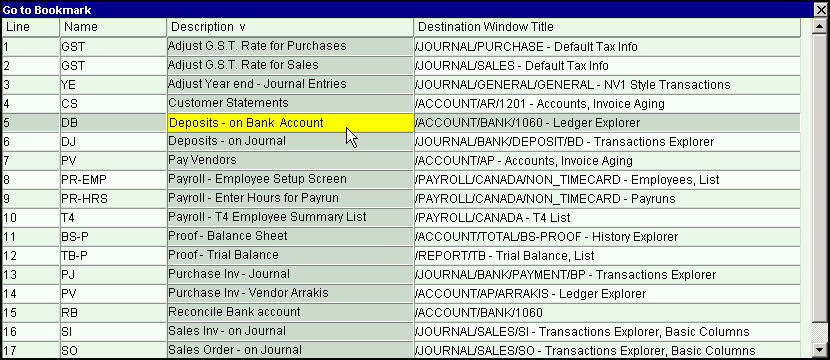
Bookmarks can be sorted by Name, Description, or Destination Window Title (by clicking on the column title cell). Shown below is a repeat of the table above, but this time it's sorted by description.
You should give bookmarks nicknames that are short and easy for you to remember (for fast keyboard access - see Bookmarks>Go to below). The description value might be used to "key into" a position a different way. For example, all bookmarks relating to transaction aging might begin with the word "Aging". Similarly, all bookmarks relating to adjusting transactions might begin with the word "Adjustment", and so on.
There are two ways to go to a bookmark. A sample using the toolbar Bookmarks button is shown below. This is how the mouse is typically used to navigate to a bookmark.
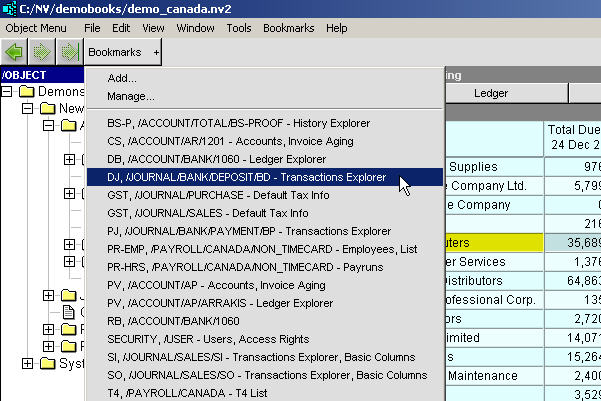
Alternatively, for fast keyboard access, press <Alt+M+G>, type as many characters of the bookmark name or description as it takes to arrive at the desired bookmark, and press enter.
Double clicking the mouse button on any row of a Bookmarks Manage window or a Bookmarks Go to window will go to the clicked bookmark. Pressing <Esc> will dismiss the window.

The <Go To Any Account> button is used to go directly to an account in the books. Clicking this button pops up a table of accounts. Selecting an account from the table takes you directly to that account in the books.

The <Undo Changes> button is used to cancel the addition of a new item that has been added, or to cancel changes to an existing item. Note: Changes can only be cancelled if the item has not yet been saved, either by moving off the item (row) or by issuing the Save (F5) command.

The <Insert Row> button inserts a new line above the active line.
The <Delete Row> button delete the selected row (item) in the current table. Note that a row (item)
can only be deleted if there are no transactions linked to it.

The <Insert Column> button appends a new column to the table.
The <Delete Column> button delete the selected column in the current table.

The <Duplicate Transaction> button is used to create any number of duplicates of the active transaction. See Duplicating Transactions for more.

The <Resize Display> button is used to resize attached images or tables. See Resizing Attachments for more.

The <Pin Default View> button is used to set (pin) a default or preferred view.
For example, when navigating to the Trial Balance report, the view normally displayed would be the same view as
the last report visited (e.g. Multiple Period Analysis).
To set the Trial Balance view as the default view for that report, you can pin that view.
That way, you will see the Trial Balance view every time you navigate to the Trial Balance report.


The <Open Detail Window> button is highlighted when a hidden detail window is available. Clicking this button will open the detail window without saving any changes to the active item.

The <Auto Fit Columns> button is used to turn the auto fit feature on or off. When this feature is on, columns widths are resized automatically to fit the data being displayed.

The <Help> button brings up the NewViews manual, positioned on the topic most relevant to your location in the books.