Printing Journal Transactions From a Table of Journal Transactions

To print journal transaction details (from pink tables):

  1. Position on any table of journal transactions (pink).

  2. If no block is marked the current journal transaction is processed.
    Transactions can be sorted by any available order, i.e. Date order, Reference order, Comment order, Line number order or in reverse.

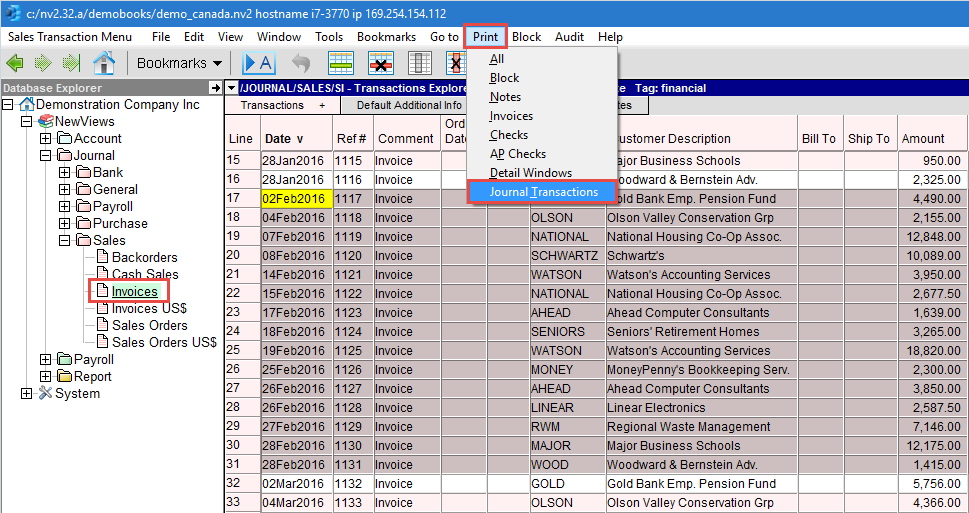
  3. Issue the Print>Journal Transactions command.

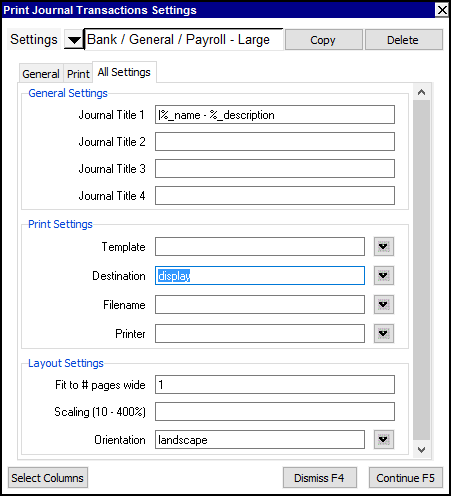
    A print settings window will appear as shown below.

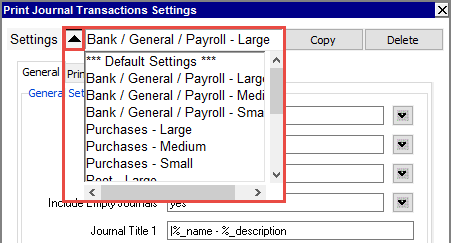
    Four groups of preset print settings are provided: three for each of the basic journal types, plus one that can be used if the command is run from the root journal.
    Each group contains presets from small to large or XL.
    Small prints a minimum set of columns/fields,
    Medium prints a more extensive set of columns/fields, and Large and XL prints a very comprehensive set of columns/fields.

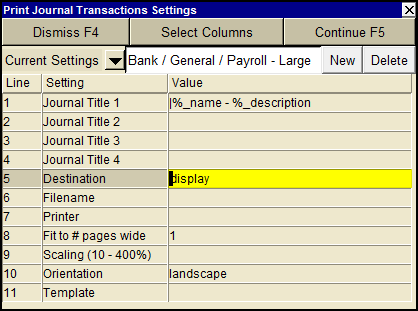
    You can use the User Options, to switch between modern and classic styles for the prompt.

  4. Fill in the print settings fields.

    For the meaning of each setting, refer to the Print Settings Field Summary found below.

  5. Click the <Continue> button or press <F5> to print the account ledgers.

    When <Continue> is clicked, the output might be sent to Excel or to a file instead of the printer, depending on the value set in the Destination field.

Print Settings Field Summary

Print Journal Transactions Settings
Line
Field         
Values
Comments
1
Journal Title 1
 
%_today
%_path
%_report_path
%_name
%_description
%_report_name
%_report_description %_begin
%_end
%_view
Text to print at the top of each journal.
Today's Date
Journal's Path
Report's Path
Journal's Name
Journal's Description
Report's Name
Report's Description
Date Range Begin
Date Range End
View
2
Journal Title 2
as above

3
Journal Title 3
as above

4
Journal Title 4
as above

5
Destination
display
file
printer
display - exports to Excel and opens Excel for a preview.
file - sends output to the file specified in Filename.
printer - sends output to the printer identified by Printer.
6
Filename

The output file name. The file type must be {".xls"}, {".xlt"} or {".pdf"}. Important see note on Output File Names options.
7
Printer

If Destination is printer then output is sent to the printer specified here. If this field is empty then output will be sent to the Windows default printer. Press <F3> to select from a list of available printers. NOTE: To clear the Printer field Press <F3> to select from the list of printers, and click on <Cancel>
8
Fit to # pages wide

Shrinks the output, if necessary, to fit on the number of pages wide specified here.
9
Scaling (10 - 400%)

Stretches the output (shrinks or expands).
10
Orientation
portrait
landscape
Prints pages vertically (portrait) or horizontally (landscape).
11
Template


Copyright (c) 2003-2025 Q.W.Page Associates Inc., All Rights Reserved.