T5018 Forms are printed from an Accounts Payable T5018 Information window:
To print one recipient's T5018 form, simply click on the appropriate account line.
To print T5018 forms for multiple recipients, use the menu commands Block>Start and Block>End to block the accounts. (Note: Accounts in the block that have a "blank" "Recipient Id" skipped.)
Issue the menu command Print>T5018s
Fill in the print settings window as described below.

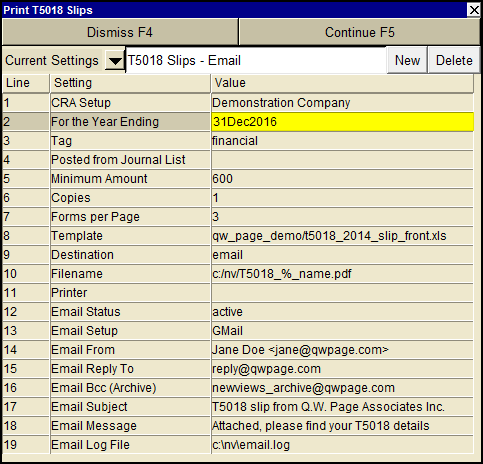
| Print T5018 | |||
| Line | Field | Value | |
| 1 | CRA Setup | Select the appropriate settings from the CRA Setup. | |
| 2 | For the Period Ending | Enter the year end date for which you are filing the return. | |
| 3 | Tag | Select "financial" for all debits for the year. Select "t5" for all "tagged" debits for the year. See Selecting Transactions with Tags for more. | |
| 4 | Posted from Journal List | A List of journal names, just type or press <F3> to pick from a list, your selection will be appended on the end of the list. The names in the list must be separated with a space. | |
| 5 | Minimum Amount | If required, you can restrict the T5018s to be printed for amounts over a specified dollar value. For example, to print only accounts with an amount of $600 or more, set this field to $600.00 | |
| 6 | Copies | This sets the number of times each recipient's T5018 information is printed. This sets the number of T5018 forms on each T5018 page. | |
| 7 | Forms per Page | This sets the number of T5018 forms on each T5018 page. | |
| 8 | Template | The template to be used to print the T5018(s). Press <F3> to select the template from an explorer (double click to select). | |
| 9 | Destination | display file printer | display - exports to Excel and opens Excel for a preview. file - sends output to the file specified in Filename. printer - sends output to the printer identified by Printer. |
| 10 | Filename | The output file name. The file type must be {".xls"}, {".xlt"} or {".pdf"}. Important see note on Output File Names options. | |
| 11 | Printer | If Destination is printer then output is sent to the printer specified here. If this field is empty then output will be sent to the Windows default printer. Press <F3> to select from a list of available printers. NOTE: To clear the Printer field Press <F3> to select from the list of printers, and click on <Cancel> | |
| 12 - 19 | Email | See email Print Settings for more. | |