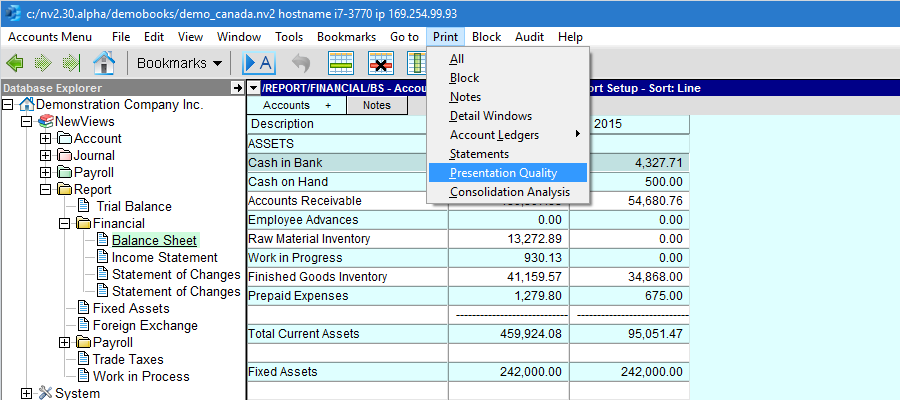
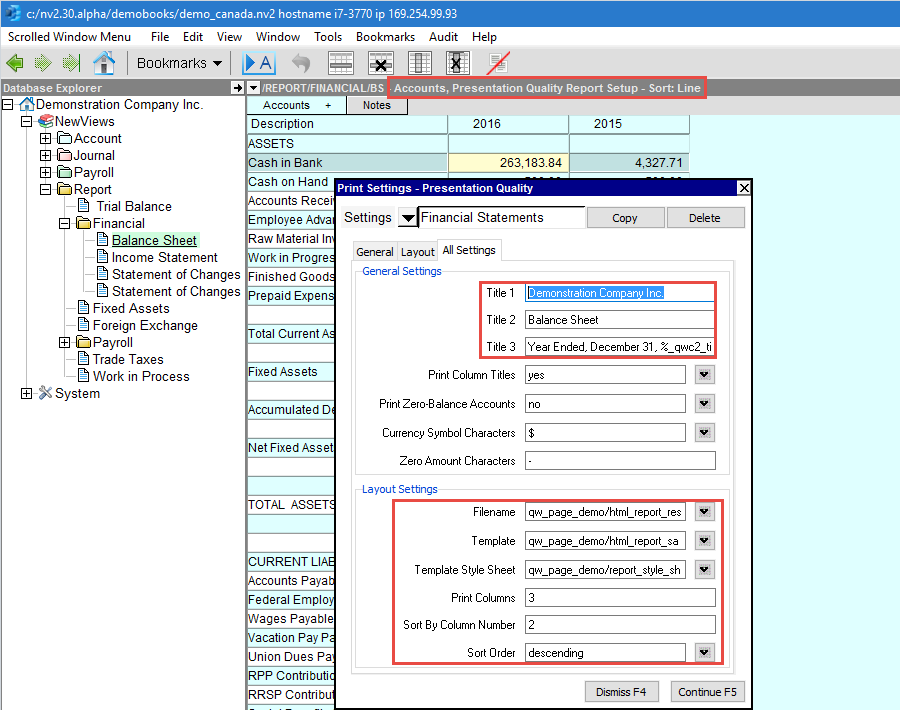
Shown below is the option prompt that appears, followed by a description of each option.
Print Settings
|
Line
| Field
| Values
| Comments
|
1, 2, 3
| Title 1
Title 2
Title 3
| Defines up to three titles to be printed at the top of the report.
The title lines (if entered) are printed at the top of the table, with Title 1 at the top, followed by Title 2, and finally Title 3. In general, Title 1 is printed using a larger font than Title 2, and Title 2 uses a larger font than Title 3. (The fonts can be changed by modifying the fonts set in the style sheet.) You can enter title text in any combination of the three Title lines. NOTE: Column title values can be substituted into page titles by using the special character pattern %_qwc1_title_% for the title of column 1, %_qwc2_title_% for the title of column 2, and so on.
|
4
| Print Column Titles
| Specifies whether to print the table's column titles.
|
5
| Print Zero-Balance Accounts
| Used to control the printing of accounts. If all amount columns for an account are zero and this option is set to no, then the row is skipped. However, rows that are "singlets" (i.e. appear alone, and not part of a group) are always included, even when all the numbers are zero. This is to ensure totals, proofs, and rows that are important enough to single out in the report structure appear on the final output.
|
6
| Filename
| The output file name. The file must be of type .html
|
7
| Template
| This file is an intermediate step in the process and can be considered temporary. If you have not created a custom template, you can type any file name with the extension .html (e.g. c:/temp.html). If you have created a custom template, press <F3> to choose the template. See Custom HTML Reports for more on creating custom templates.
|
8
| Template Style Sheet
| Enter the name of the HTML template to be used to control the style sheet settings (press <F3> to choose the template style sheet).
The style sheet file controls font size, line height, bolding, column spacing, etc.
This field is left blank if you are using a custom template.
Sample standard GAAP compliant format style sheets are installed in c:/nv/print_templates/html assuming c:/nv is the NewViews installation folder.
Three style sheets are provided, as follows:
report_style_sheet.html - two amount columns
report_style_sheet_3_amounts.html - three amount columns
report_style_sheet_4_amounts.html - four amount columns
The style sheet file used for most sample reports found in this documentation is report_style_sheet.html
|
9
| Print Columns
| 3 or other
| The default value is 3, the account description plus 2 amount columns, but additional columns may be specified and printed.
|
10
| Sort By Column Number
| 2 or other
| The default value is 2, which is the current period amount column in most formal reports. It must be less than or equal to the number of columns to be printed.
|
11
| Sort Order
| descending
ascending
| The default value is descending. Press <F3> to select descending or ascending.
|
12
| Currency Symbol Characters
| $ £ ¥ ₣ ₤ ₧ € % ‰
| The default value is $ If your display, keyboard or browser has difficulty with special characters you can use explicit HTML codes (e.g. $ € £ etc.). Press <F3> to select from a list of available currencies. Note: the HTML code characters are echoed as the value, however the corresponding currency character will print.
|
13
| Zero Amount Characters
| -
| The default value is - (hyphen), which is the accepted formal standard to represent the value 0.00 (you may specify any characters to represent the 0.00 value, including "0.00").
|
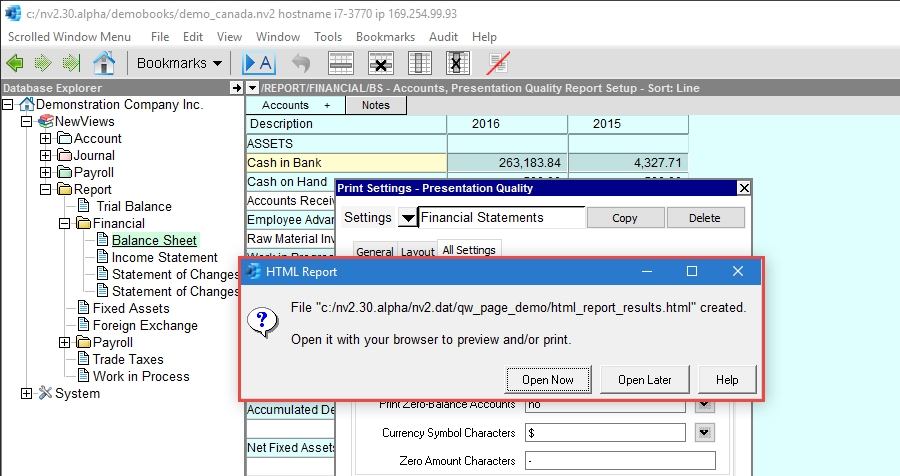
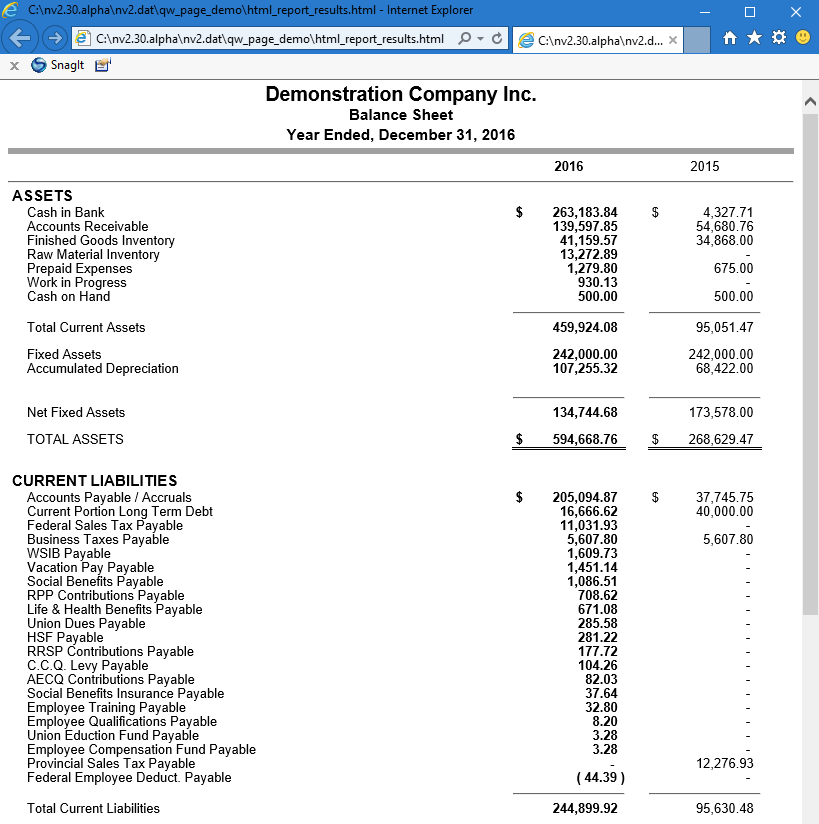
When the print operation is completed a notification window appears, as shown below.
At this point you have the option to launch your default browser to preview/print the result immediately,
or you can open the file created at any later time using your favorite browser or HTML viewing software.