Magnetic Ink Character Recognition, or MICR, is a character recognition technology used primarily by the banking industry to facilitate the processing of checks. It consists of the routing number and account number at the bottom of a check.

The MICR characters are printed using the E-13B font with magnetic ink or toner, usually containing iron oxide. As a bank machine decodes the MICR text, it first magnetizes the characters in the plane of the paper. Then the characters are passed over a MICR read head, a device similar to the playback head of a tape recorder. As each character passes over the head it produces a unique waveform that can be easily identified by the system.
To print your own MICR checks you must use:
The hardware, printer, magnetic ink toner cartridge and blank check paper is not provided by Q.W. Page. For hardware, search on the Internet using the term micr printers.
An open source font is provided with the NV2 installation. The E-13B font is located in the folder nv2.dat (the nv2.dat folder is located in the NewViews installation directory). See How to install a font in Windows below.
All NV2 bank accounts have the EFT information tab. Rows 5, 6 and 7, the Bank ID, Transit and Account number must be filled in. See "Setting up a Bank for EFT" for more.
Two sample check templates, containing the MICR field are provided. The MICR field can be added to any check template. See Document Templates for details on adding fields to print templates.
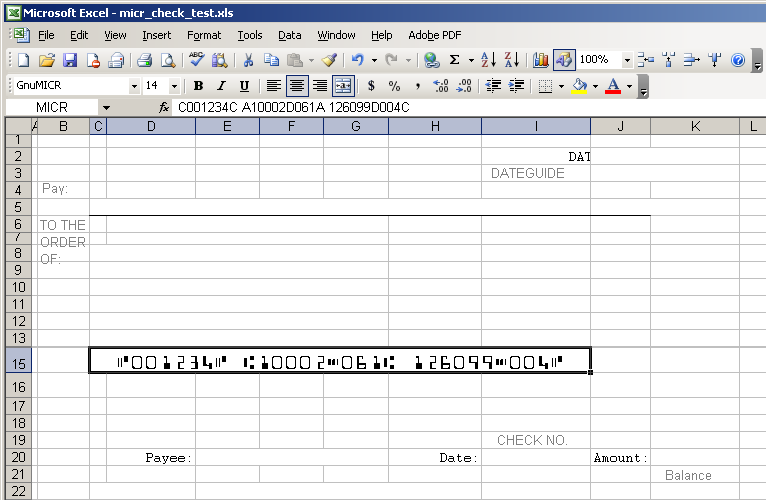
The MICR print template field is MICR. It should be placed at the bottom of the check portion. The MICR field is a combination of the CheckNumber, BankTransit, BankId and BankAccount fields. You must use an E-13B font to print this field. If Excel does not list an E13-B or MICR font in the font list, you must install the font. The GnuMICR.ttf font is shipped with NewViews 2, but you have to install it via Windows. How to install a font in Windows see below
.
In the above screen shot, the MICR field has been placed on the merged cell that spans from C15 to I15.
This sample has some numbers entered to test the size and placement of the E-13B font.
Note: after testing the size and location of the MICR field, be sure to remove any test numbers from the MICR cell.
In the above example, the open source GnuMICR.ttf font is used.
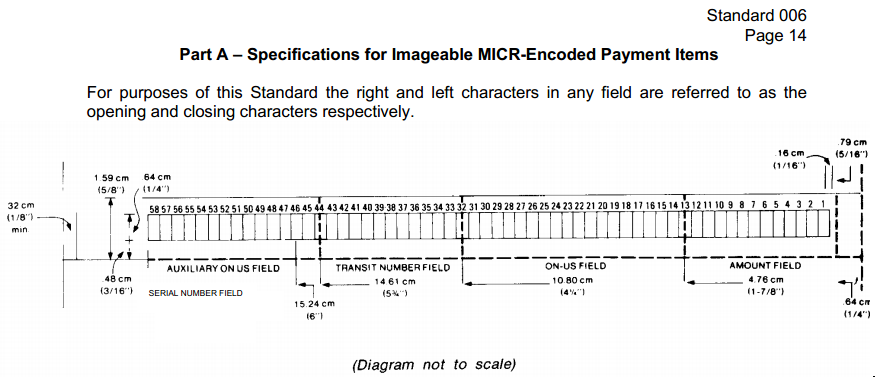
The location of the MICR font must be in the clear band area of the check.

To install a font, follow these steps: