Click NewViews/Journal/Bank/Payment/Bank Payments in the NV2 Database Explorer.
Activate the vendor check to be printed. If you want to print more than once check, use the Block>Start and Block>End commands to mark the checks in a block.
Issue the Print>AP Checks command and fill out the prompt as follows:
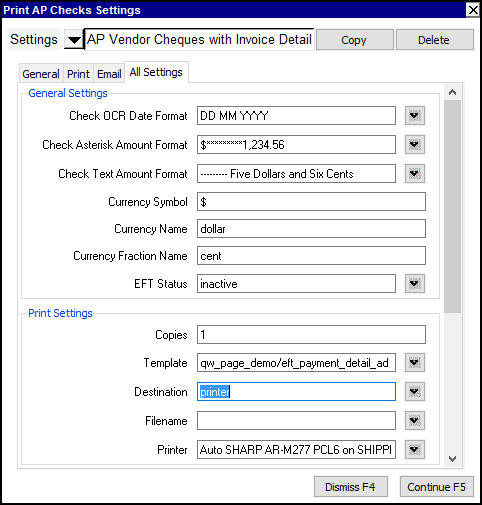
| Print AP Checks Settings | |||
| Line | Field | Comments | |
| 1 | Copies | The number of copies to be printed. | |
| 2 | Template | The template to be used to print the check(s). Press <F3> to select the template from an explorer (double click to select). Check templates supplied with NV2 contain the words "check" in their names. For example, "safeguard_check_sf5001.xls". | |
| 3 | Destination | display file printer | display - exports to Excel and opens Excel for a preview. email - creates an email file for attachment. file - sends output to the file specified in Filename. printer - sends output to the printer identified by Printer. |
| 4 | Filename | The output file name. The file type must be {".xls"}, {".xlt"} or {".pdf"}. Important see note on Output File Names options. | |
| 5 | Printer | If Destination is printer then output is sent to the printer specified here. If this field is empty then output will be sent to the Windows default printer. Press <F3> to select from a list of available printers. NOTE: To clear the Printer field Press <F3> to select from the list of printers, and click on <Cancel> | |
| 6 | Check OCR Date Format | Controls the date format printed on the check. Controls the order in which the Day, Month and Year are printed. Lines 6 to 11 control the new Check 21 and CPA check standards See the manual section Check Date & Amount Formatting for more information on the use of this cell name. | |
| 7 | Check Asterisk Format | Controls the asterisk format printed on the check. | |
| 8 | Check Text Amount Format | Controls the text amount format printed on the check. | |
| 9 | Currency Symbol | Controls the currency symbol printed on the check. | |
| 10 | Currency Name | Controls the currency name printed on the check. | |
| 11 | Currency Fraction Name | Controls the currency fraction name printed on the check. | |
| 12 | EFT Status | Controls printing of checks based on the EFT setting. | |
| inactive | Checks are printed for vendors and non-direct deposit employees. | ||
| active | Only direct deposit stubs are printed, and only for direct deposit employees. | ||
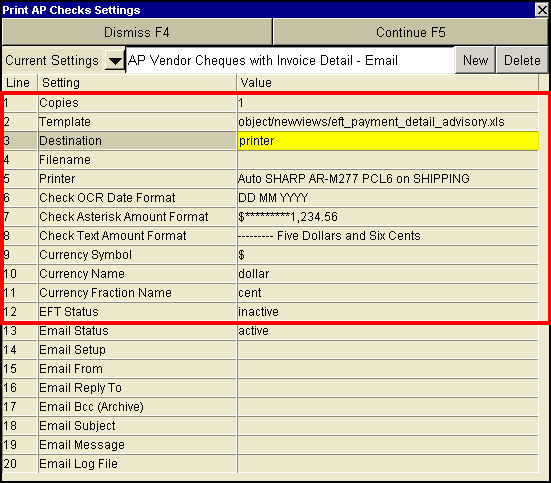
| 13 - 20 | Email | See email Print Settings for more. | |
Click the Continue button to print the vendor check(s).