There are two ways to set the name for a cell or range of cells in Excel. The simplest is to use the Name Box, and the second, which provides more detail on the names in the workbook, is to use the Excel (97, 2000, 2002, 2003) command Insert>Name>Define or Ctrl-F3.
In Excel (2007 and 2010) the command is Formula>Name-Manager or Ctrl-F3.
For one cell, activate (click on) the cell whose name you wish to set. For a range of cells, left-click on one corner of the range and "drag" the selection to include the remainder of the range.
Click on the Name Box just above cell A1.
Type the name for the cell or range and press <Enter>
Here are some images to illustrate the above:
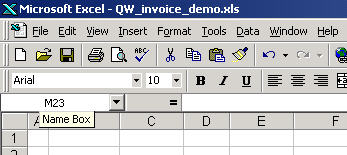
This is the Name Box
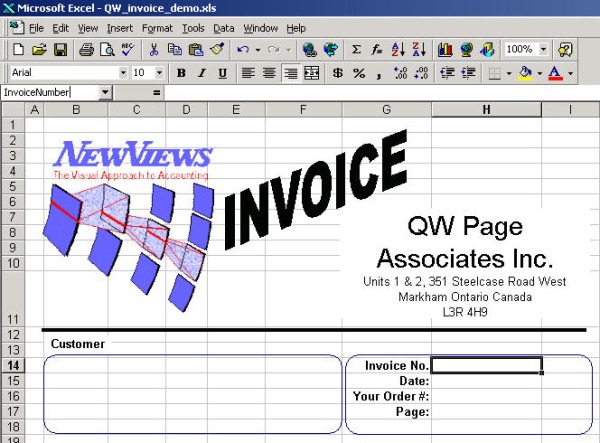
Here, cell H14 has been activated and the name "InvoiceNumber" is being typed into the Name Box.
This method displays a table of all the named cells and ranges in the workbook. (This is the only way to delete names should the need arise.)
For one cell, activate (click on) the cell whose name you wish to set. For a range of cells, left-click on one corner of the range and "drag" the selection to include the remainder of the range.
In Excel (97, 2000, 2002, 2003) issue the command Insert>Name>Define or Ctrl-F3
In Excel (2007 and 2010) issue the command Formula>Name-Manager or Ctrl-F3
In the "Define Name" box, type the name for the cell or range and press <Enter>
Here are some images to illustrate the above:
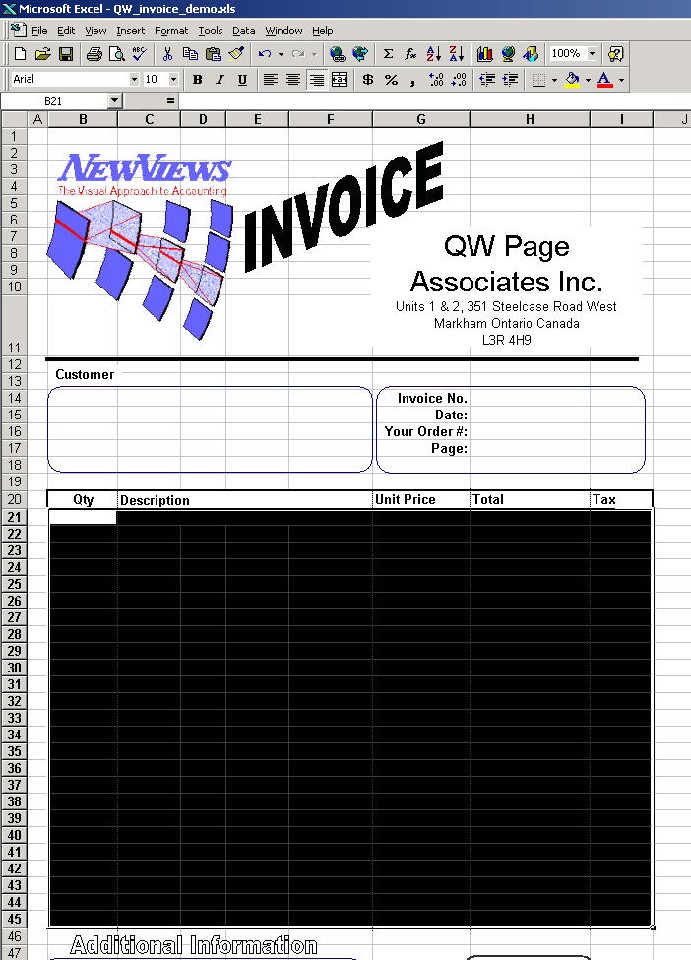
The cell range is selected by dragging the mouse with the left-button pressed.
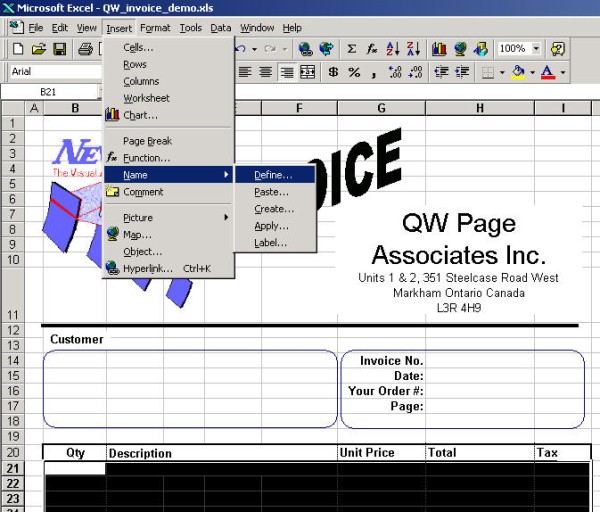
In Excel (97, 2000, 2002, 2003) issue the command Insert>Name>Define or Ctrl-F3
In Excel (2007 and 2010) issue the command Formula>Name-Manager or Ctrl-F3
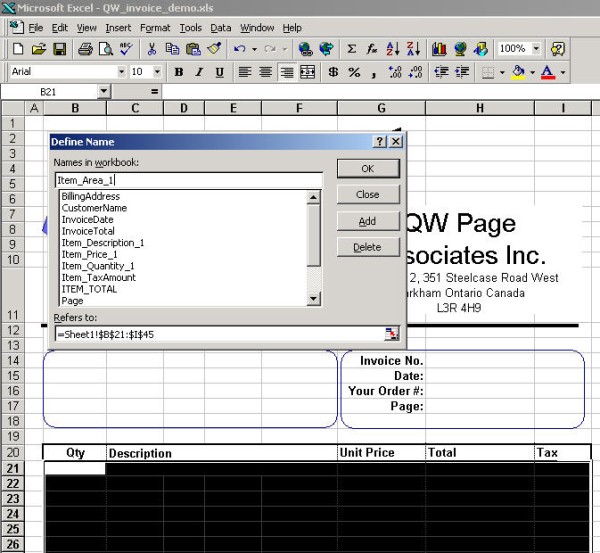
The name for the cell or range is typed in.