W2s are printed/exported from the W2 List window:
To print/export one employee's W2 form, simply click on the appropriate employee line.
To print/export W2s for multiple employees, use the menu commands Block>Start and Block>End to block the employees. (Note: Employees in the block that have "no" in the "Print W2" column are skipped.)
Issue the menu command Print>W2s
Fill in the print settings window as described below.
W2's may be printed in a fashion that is suitable for importing into third party software.
To do this, follow the instructions above but make the following changes to the prompt box:
1. Set the "Copies per employee" and the "Forms per Page" to 1
2. Change the template (Line 9 in the print W2's box) to be W2-List.xls
3. Change the destination (Line 10) to be Display
This will print each employee's information on a single row of an Excel spreadsheet. You can then use
this spreadsheet to import the information into your third party software. Please see the
instructions that came with your software to determine how this is done.
Contact your local IRS office for information on third party software.
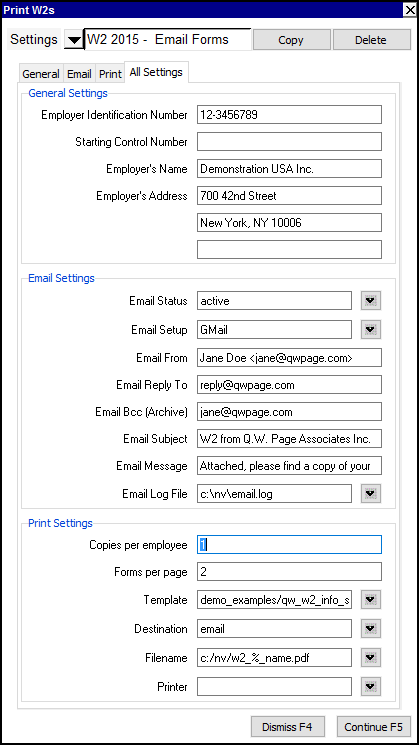
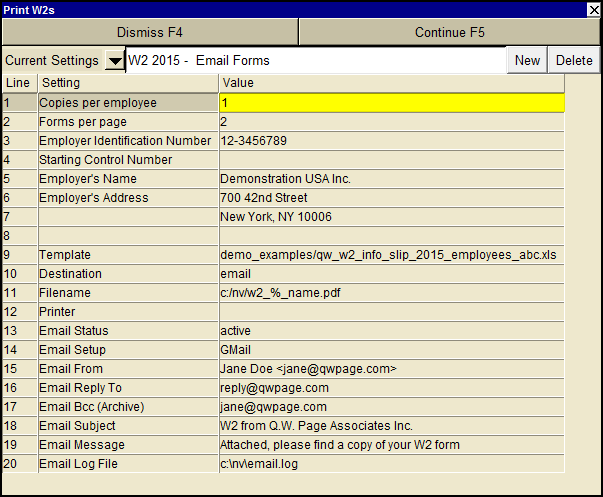
| Print W2s | |||
| Line | Field | Value | |
| 1 | Copies per employee | This sets the number of times each employee's W2 information is printed. | |
| 2 | Forms per page | This sets the number of W2 forms on each W2 page. | |
| 3 | Employer Identification Number | Enter your federal identification number. | |
| 4 | Starting Control Number | (Optional) Enter the starting control number to be printed in box a. | |
| 5 | Employer's Name | Enter the employer name to be printed on each form. | |
| 6, 7 & 8 | Employer's Address | Enter the employer address to be printed on each form. | |
| 9 | Template | The template to be used to print the W2(s). Press <F3> to select the template from an explorer (double click to select). There are two W2 templates. | |
| 10 | Destination | display file printer | display - exports to Excel and opens Excel for a preview. file - sends output to the file specified in Filename. printer - sends output to the printer identified by Printer. |
| 11 | Filename | The output file name. The file type must be {".xls"}, {".xlt"} or {".pdf"}. Important see note on Output File Names options. | |
| 12 | Printer | If Destination is printer then output is sent to the printer specified here. If this field is empty then output will be sent to the Windows default printer. Press <F3> to select from a list of available printers. NOTE: To clear the Printer field Press <F3> to select from the list of printers, and click on <Cancel> | |
| 13 - 20 | Email | See email Print Settings for more. | |