Year-end Reporting with NewViews
If your fiscal is coming up, your accountant will be asking for year-end reports. Did you know you can create a single Excel workbook that contains multiple reports from NewViews? If Excel is not running when a report is printed to “display”, Excel is launched and a new sheet in a new workbook is created. If Excel is already running when a report is printed to “display”, NewViews will synchronize with Excel and the prompt shown below will appear.
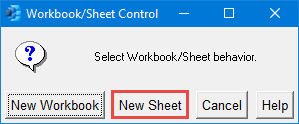
The New Sheet option will create a new, named sheet in the active Excel workbook. To append sheets to existing workbooks, switch to Excel, activate the target workbook, switch back to NewViews, issue the print command and select New Sheet. You will end up with one Excel file that contains all the reports you need to to send to your accountant.
Which Reports, Views and Dates?
NewViews can print several types of reports; the most basic ones are the:
- Trial Balance
- Balance Sheet
- Income Statement (P&L)
You should also include:
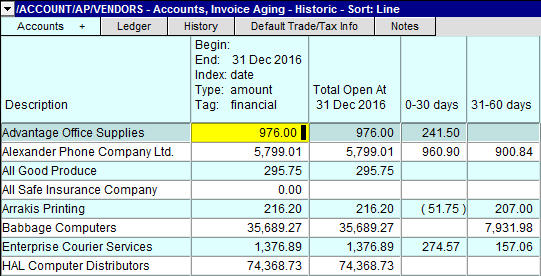
- Historic Aged AR
- Historic Aged AP
- Bank Reconcile – Open Items
- Full detail of all Trial Balance (GL) accounts
If you don’t have a Trial Balance report in your books, we can assist you with setting it up. A traditional Trial Balance includes all the posting accounts on the Balance Sheet and Income Statement. Trial Balance reports vary in length depending on the number of summary accounts.
Three views are typically used to print the Year-end reports. It is best to report the current year being reviewed and the prior year. The prior year will show that the prior year’s adjusting entries have been posted.
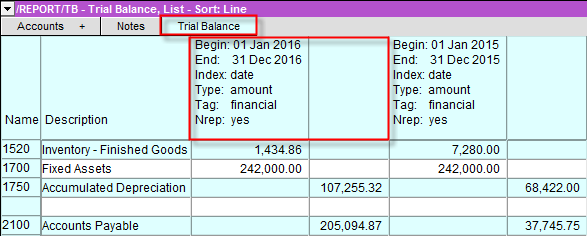
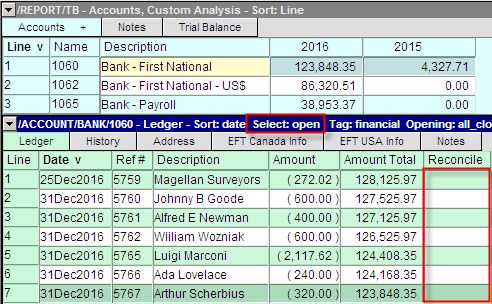
For the Trial Balance we use the “Trial Balance” view, as shown below. The Trial Balance view has separate Debit & Credit columns for a single date period. There are no negative values on the Trial Balance report.
(This can be installed by using the right mouse button and clicking on the window’s title bar that reads /REPORT/(report name) to activate the Report Desktop Menu, then issue the Tools > Create Trial Balance command)
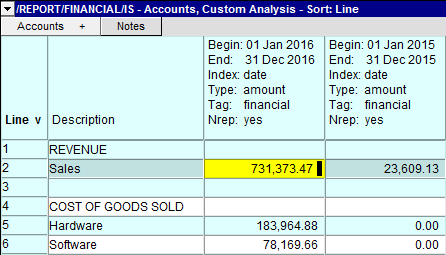
For the Balance Sheet and Income Statement we use the “Custom Analysis” view with two “amount” columns.
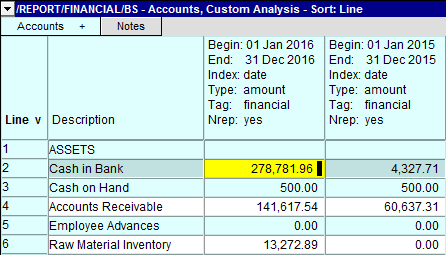
If all the accounts have the Normal Representation (Nrep) set, i.e:
- Balance Sheet accounts Nrep; Perpetual
- Income Statement accounts Nrep; Period
then you should set the Begin Date as shown and the Nrep to yes. This will provide the proper account balances on all the financial reports without having to change the Begin Date.
For the Historic Aged reports we use the “Invoice Aging – Historic” view that allows you to set the “Aging” date back to the fiscal period end date. You should print both the Historic AR and AP this way.
For the Bank Reconcile report, we need to print the items on the open view of the bank account(s). The “Ledger” balance of the Bank account in NewViews and the “Statement” balance from the Bank are typically different. The difference are the outstanding items (cheques) that have not yet cleared.
The Year-end reports should also include all the accounts on the Trial Balance in full detail. To “print” the detail of all the Trial Balance accounts, we use the Print > Account Ledgers command. This command is fully described in the main NewViews manual under Printing > Printing Tables > Printing Account Ledgers.
There are several choices – we will use simple.
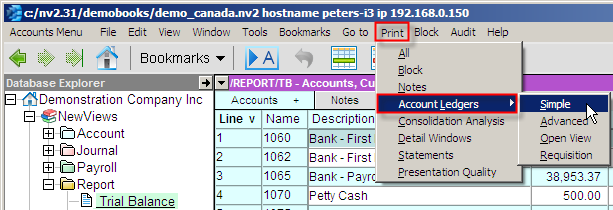
Before we issue the command, block all the accounts on the Trial Balance that you wish to include in the report. The Print > Account Ledgers command prompt has a Select Columns button. This button controls which columns (fields) are printed and in what order.
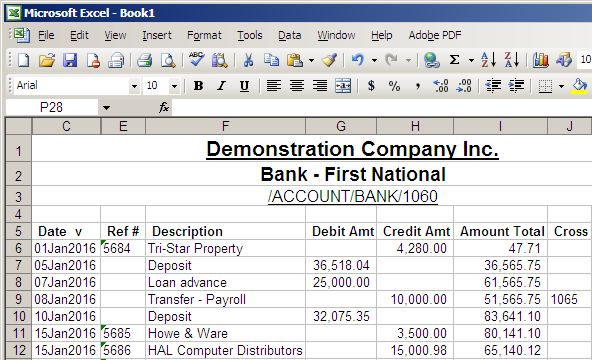
A sample account’s ledger output is shown below. A typical report may be several thousand rows long, but it should contain all transactions for the year.
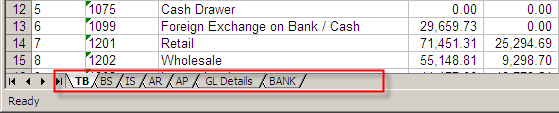
At the end, there should be one Excel workbook with several tabs at the bottom as shown below. Clicking on the tab switches between worksheets. The Excel tab labels can be edited with a double click.