Restoring Deleted Columns on Tables
Help! I’ve accidentally deleted a column – how can I get it back?
With NewViews, you can customize your workstation; this enables you to structure the tables you work on most frequently to meet your preferences (e.g. rearranging the column order and/or removing columns you don’t need to see). You can think of your workstation as the lens through which you view your data – changing the lens can change what you see and how you see it, but doesn’t change the landscape itself. So if you delete a column in a table, the data it displayed is not affected and you can choose to redisplay that column at any time.
If you delete a column by mistake, or delete it and then decide you want it back, you have a few options, depending on what kind of table it is (i.e. an account ledger, a table of accounts, or a journal).
Restoring deleted columns in account ledgers (green tables) or journals (pink tables)
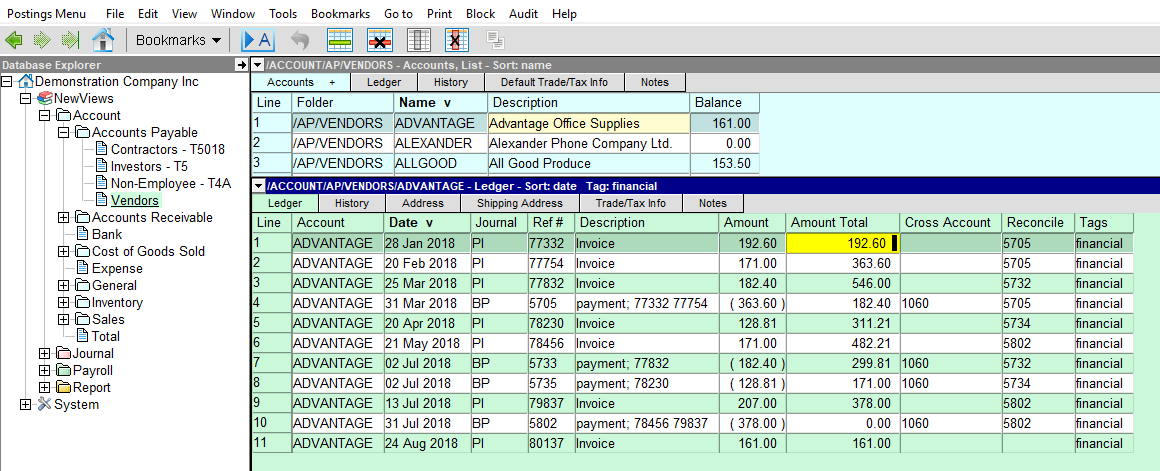
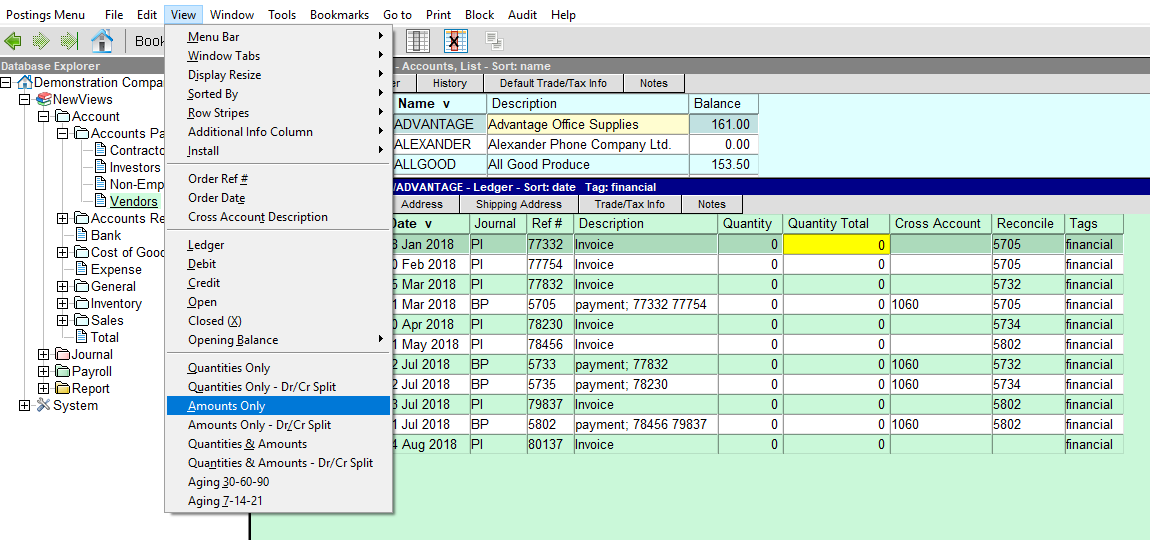
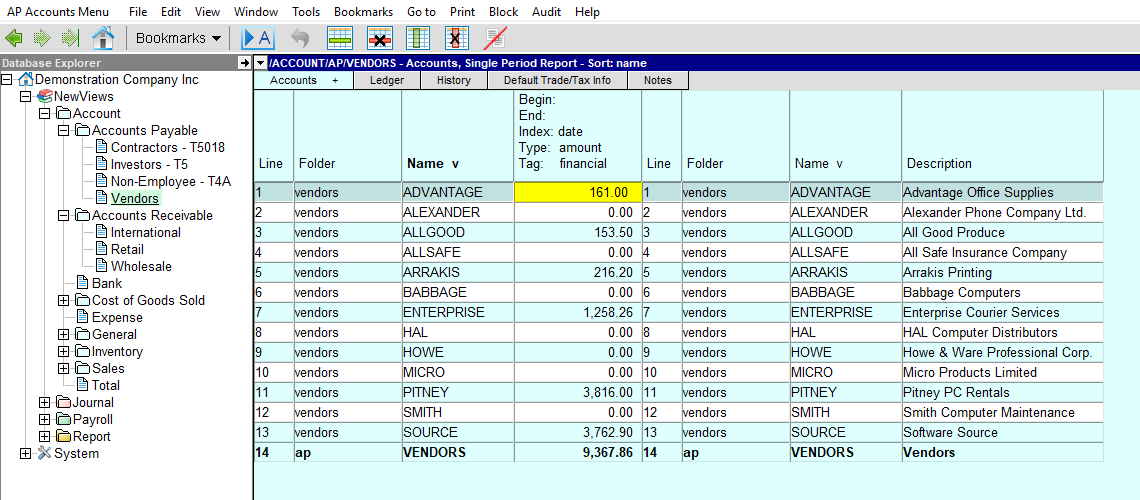
If you have deleted a column in an account ledger (green table) or journal (pink table), all you have to do is switch to a view of the ledger/journal that has a different set of columns. For example, let’s say you accidentally delete the Amount Total column on a vendor ledger.
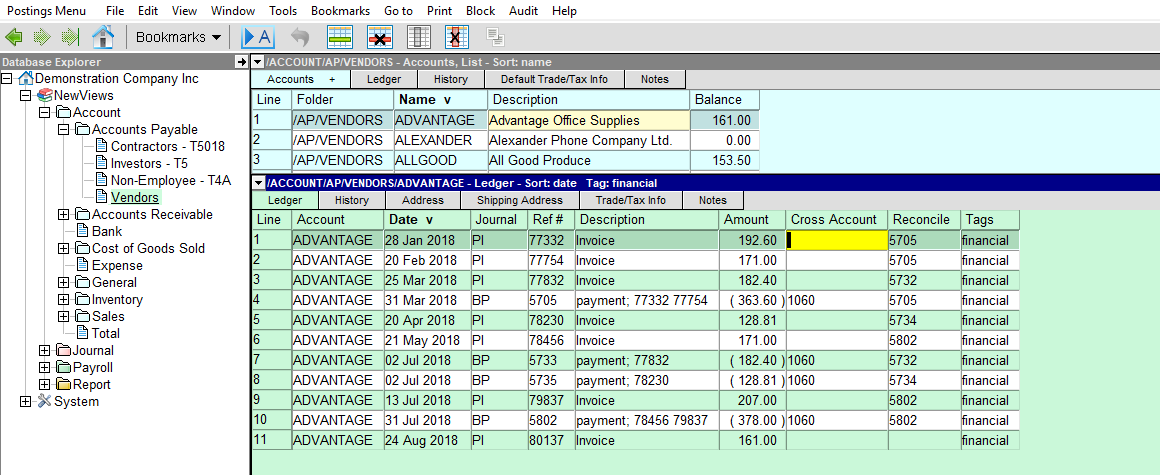
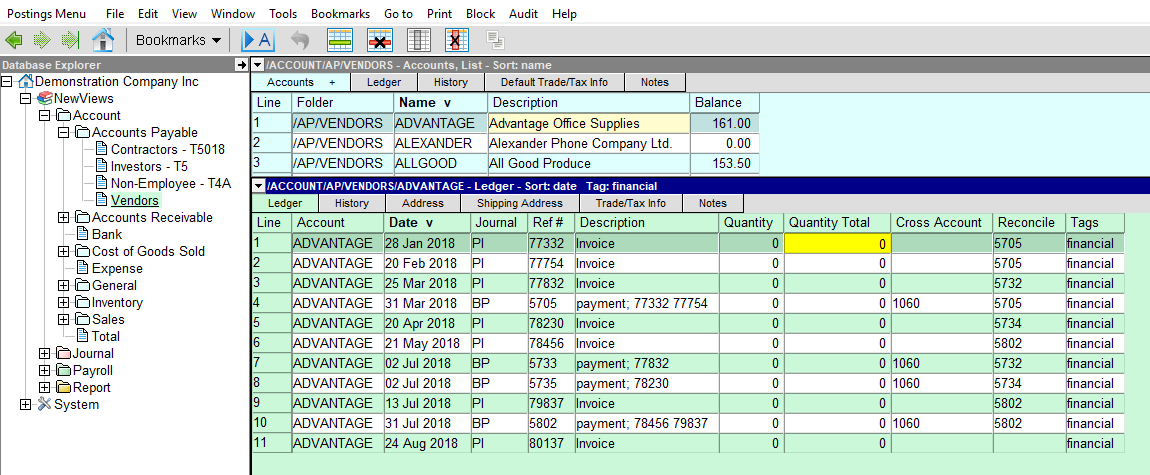
Use the View command to switch the view of the ledger to one which has a different set of columns. The Ledger, Debit, Credit, Open, Closed and Opening Balance views all share the same set of columns, filtering the data to reflect the active view. So instead, choose a view that changes the column set. For example, if your ledger view is set to display amounts only, you can switch to any of the following views: Quantities Only, Quantities Only – Dr/Cr Split, Amounts Only – Dr/Cr Split, Quantities & Amounts, Quantities & Amounts – Dr/Cr Split, Aging 30-60-90, Aging 7-14-21.
Note: If you are trying to restore a column on a journal view set to display amounts only, you can switch to any of the following views: Quantities & Amounts, Unit of Measure, Units of Measure & Inventory, Order/Ship/Backorder Quantities, Units of Measure & Order/Ship/Backorder.
After changing the view to a different column set, change it back to the view you were on when the column was deleted. You will find that the missing column has automatically been restored.

Restoring Columns in Account Tables (blue tables)
If you accidentally delete an amount column from a blue account table, you can simply add it back in using the New Column button on the toolbar.
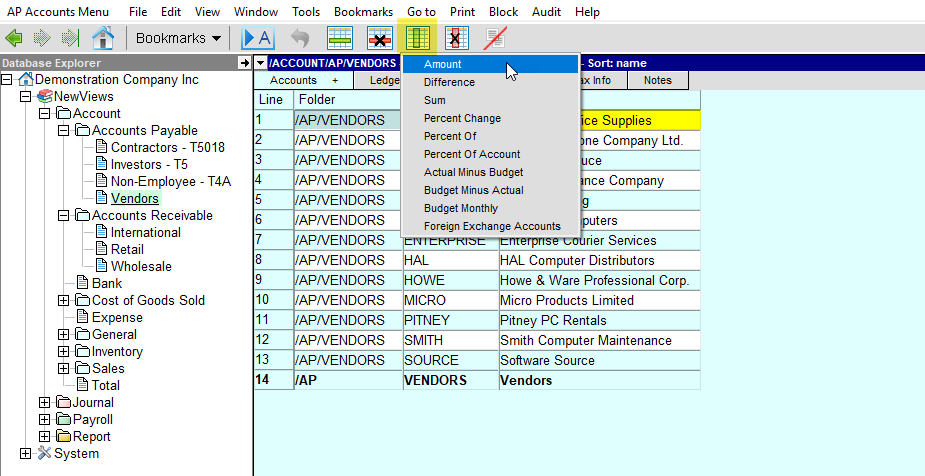
If you need to restore a column other than an amount column, the best option is to copy and paste a set of columns that includes the one you want to restore (see instructions below).
Copying Columns from One Table to Another
When copying columns in an account table, you can only copy the entire set; those columns are then pasted and appended to those in the destination table.
NOTE: Unless you are very familiar with the structure of various tables in NewViews and know what results to expect, we recommend you APPEND (and not replace) the pasted columns.
Once the columns are pasted, you can delete the ones you don’t want/need and move the remaining column(s) to the desired position.
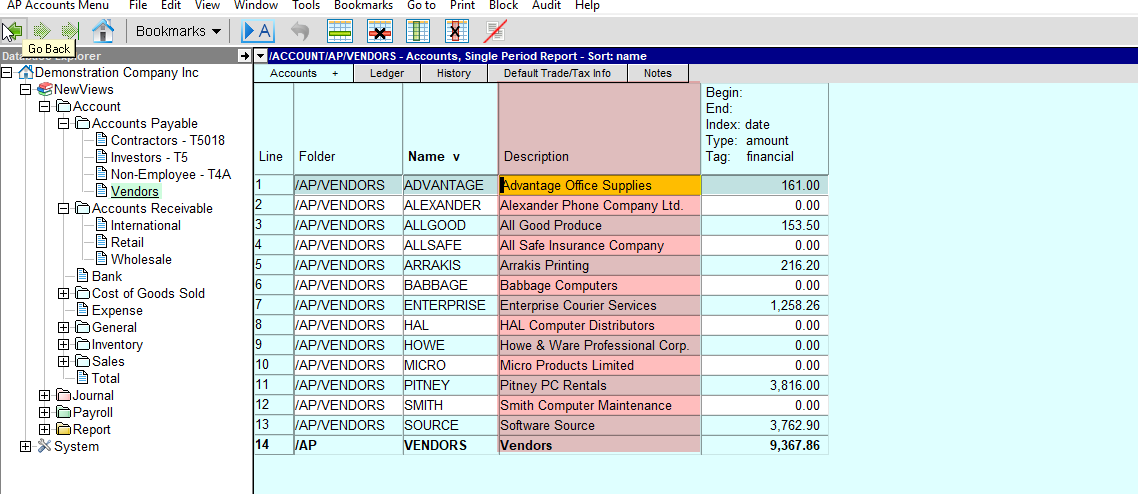
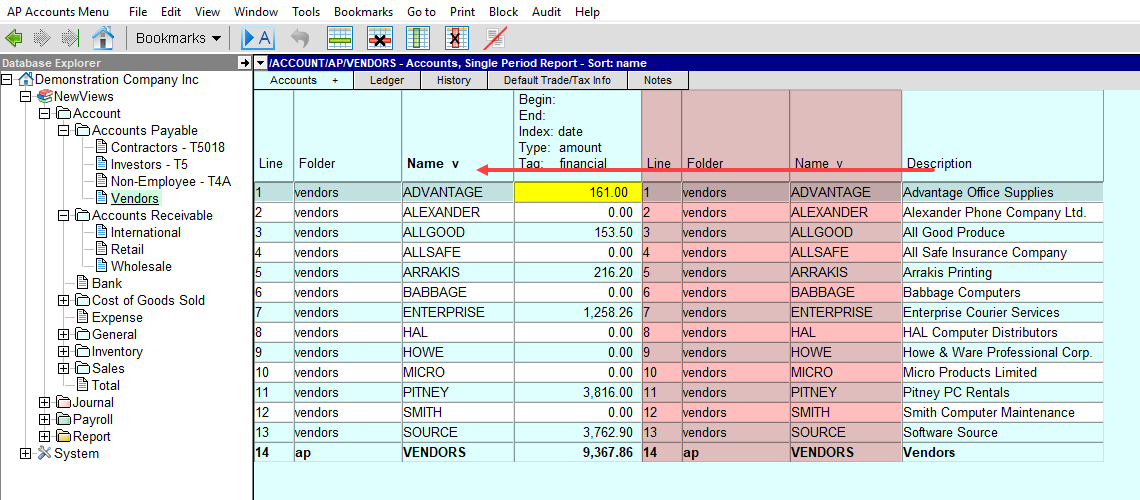
In the example below, we have deleted the Description column from the vendor ledger tables.

To restore the Description column by copying and pasting columns from another view:
- Find a view of the table with the Description column. In this example, we will use the Custom Analysis view.
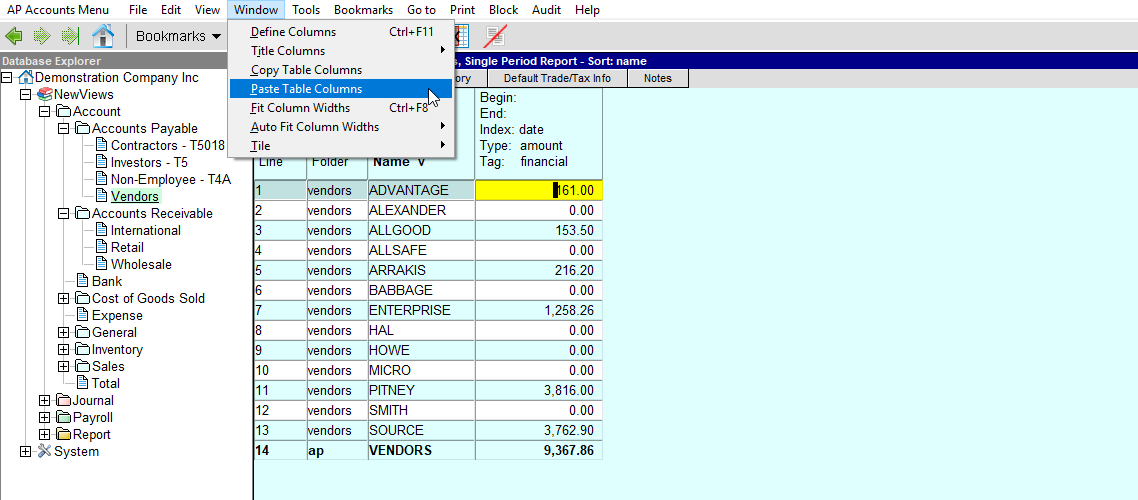
- Position anywhere in the table and issue the command Window > Copy Table Columns.
- Go back to the view on which the Description column is to be restored and issue the command Window > Paste Table Columns.
- When prompted to select column paste behavior, choose Replace or Append. When in doubt, choose Append.
Replace will replace all the columns in the destination table with the columns copied from the source table.
Append will add all the columns in the source table to the destination table (as shown below). - Delete all duplicate columns.
- Position anywhere in the restored Description column and use + left arrow/right arrow to move it to the desired position.


Two more options for restoring deleted columns are described below. Keep in mind that these actions (restoring a window’s default setup and restoring a backup of a workstation) have associated consequences that must be considered.
Restoring a Table (Window) to Its Default Setup
This option may have fewer steps than copying and pasting table columns, but will do more than simply restore a column that has been accidentally deleted. Returning to the example of restoring the Description column in the vendor ledger table, issuing the Window >Default Setup command will return ALL views associated with the table you are on to their default setting. In this example, that means you would have to recreate any customized table layouts for all views of AR accounts, including Multiple Period Analysis, Custom Analysis and any new views that had been created to meet specific needs.
If you haven’t performed much customization and/or are comfortable recreating any custom layouts, you can restore the default setup for a window as follows:
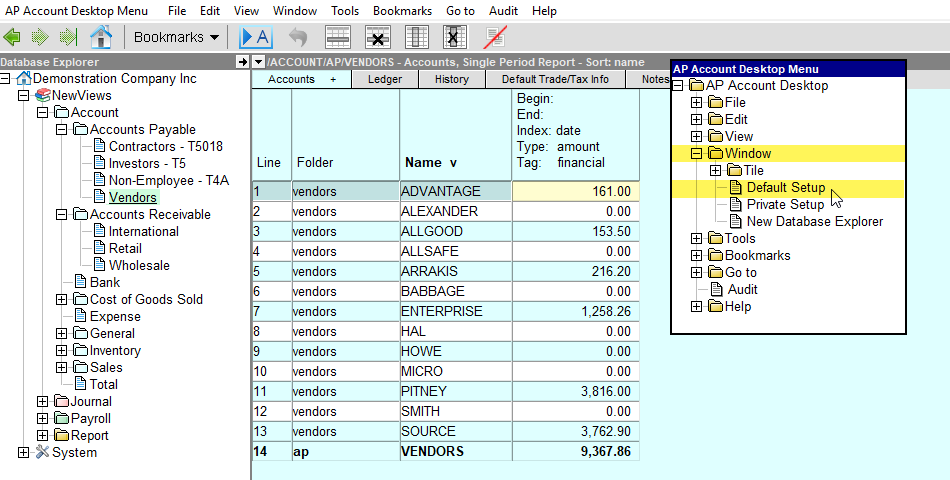
- Right click the status bar at the top of the window (top pane or bottom pane) to access the Desktop Menu.
- Expand the Window folder and choose Default Setup.
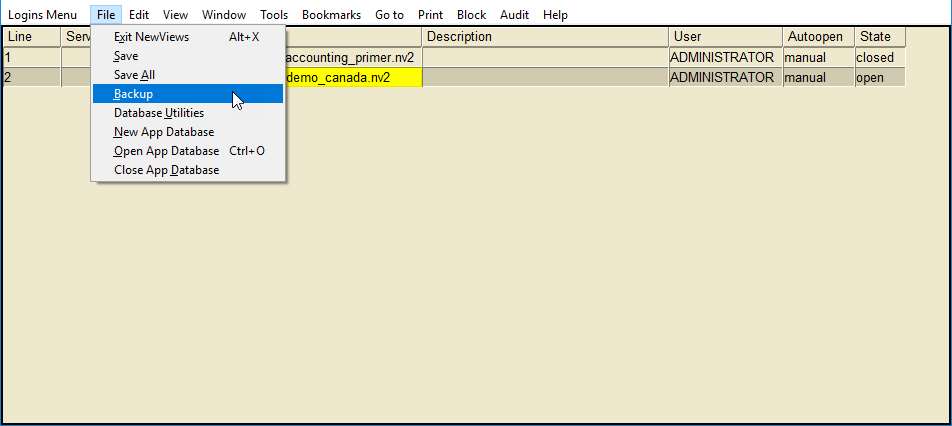
Backing Up and Restoring Workstations
It is always a good idea to be proactive by backing up your workstation any time you make a change to the structure of tables, create a custom view, add or edit prompt settings, etc.
Backing up your workstation and backing up your books are performed independently. Backing up your books on a daily basis is strongly recommended. Backing up your workstation is advised whenever you put time and effort into customizing your workstation and want to make sure your settings can easily be recreated.
To backup your workstation, simply execute the File > Backup command from the workstation window. The backup file will be named workstation.nv2_backup_logout and will be stored in the same directory as your NewViews program file (e.g. c:\nv2 or c:\nv2_nph).
To restore a workstation from a backup, rename the current workstation.nv2 file (e.g. to worktation.nv2_old), then rename the backup file to workstation.nv2. Be aware, however, that restoring a workstation will wipe out all changes to the workstation (including breadcrumbs, bookmarks, customization of table layouts, customized views, etc.) that were made since the workstation was backed up.